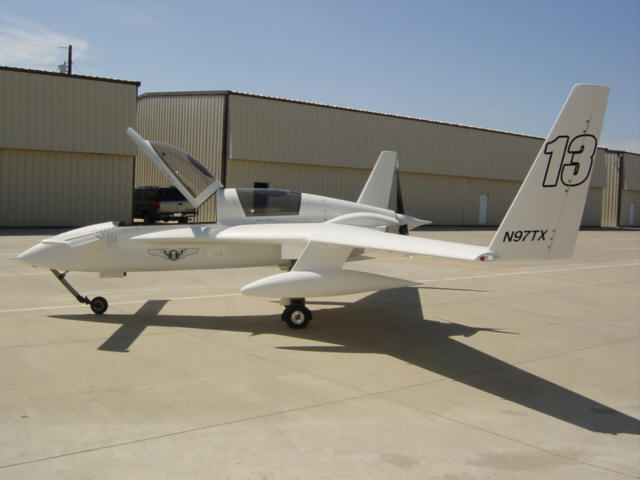
The Berkut is a great cross-country airplane - it can get Sandy and I clear across the country in just about 4 hours. However, it does not have much room for extended baggage like camping gear. The fix for that is to add additional storage space - and since we can't do that in the fuselage, so we do what the military does and sling it under the wings! This is really nothing new...Long-EZs have been doing this for years, but I'll be the first Berkut with pods. Another Berkut 13 first!
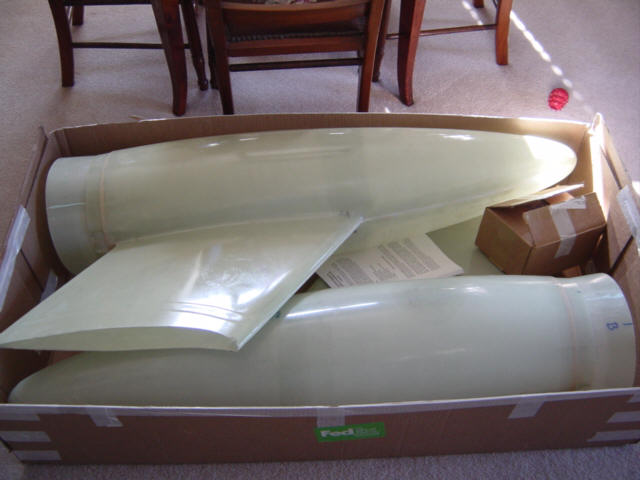
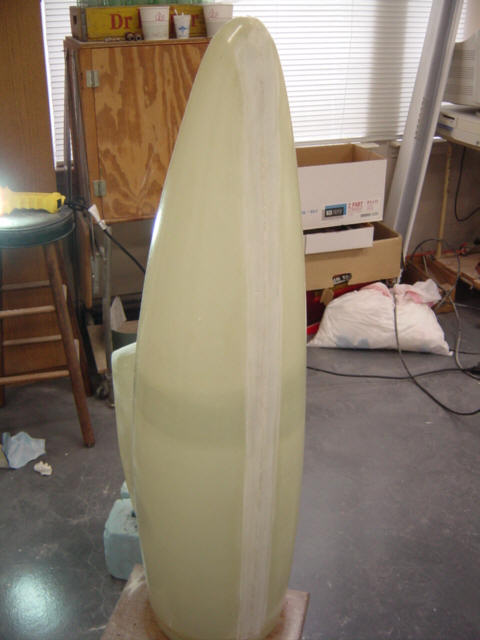
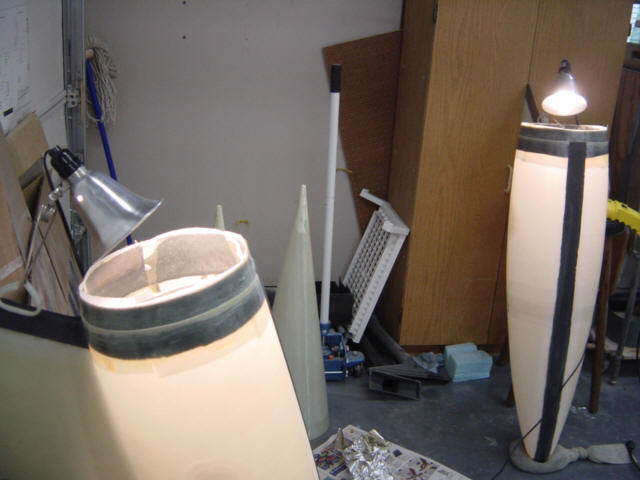
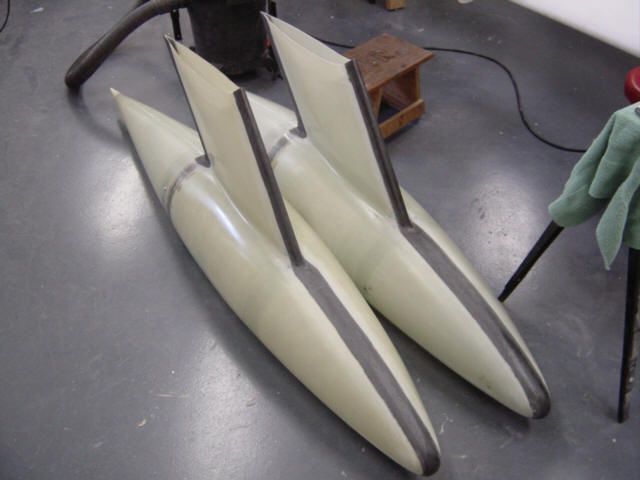
I started out with a set of Gary Hunter's quick-build pod kit. In retrospect, I wish I had purchased the regular kit as I would have done the internal tapes in carbon instead of glass...oh, well. Otherwise, the quick-build version will save you a few hours of build time. Anyway, the kit is top-notch in all aspects! Gary did a great job and the molded surfaces are very clean and have very few pin holes and almost no extra resin weight. Gary even provides all the extra fiberglass that you need to put it all together. How's that for complete! By putting a light behind the pod, you can even see the internal skeleton build-ups in front and behind the pylon. Since the Berkut wing is slightly different and much stiffer than the Long-EZ wing, and the fact I'm going to push these pods about 50kts faster than they were designed to go - I knew there were going to be several changes to be made. I also found out how much work these things would require to complete! So, lets get started.
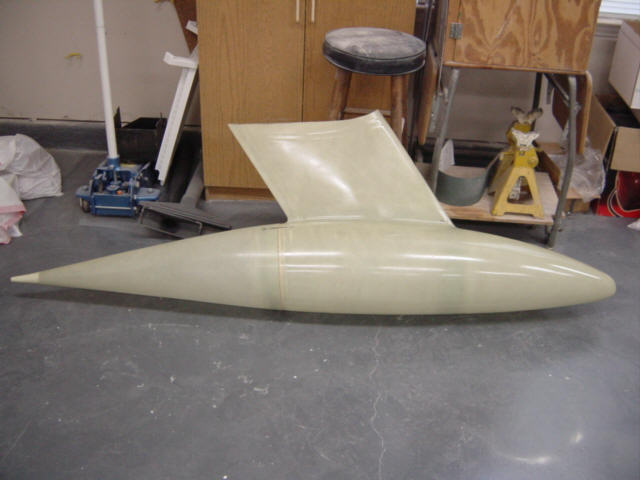
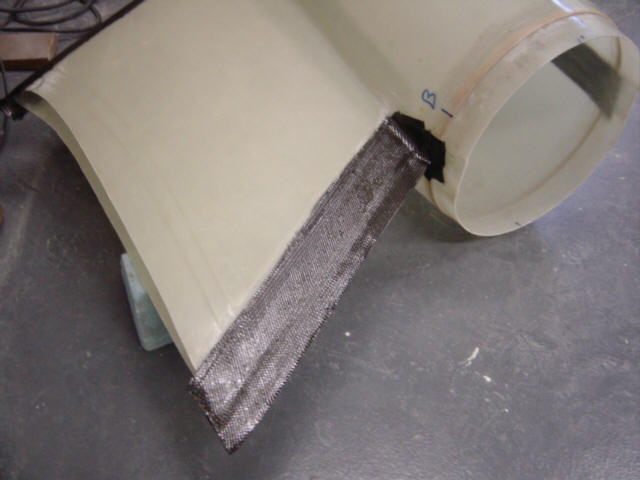
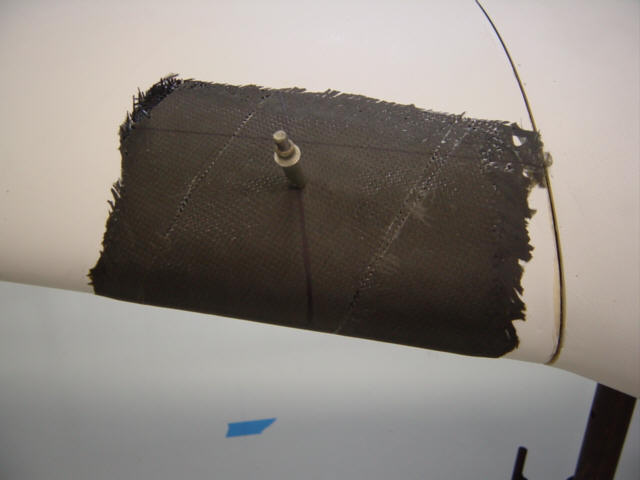
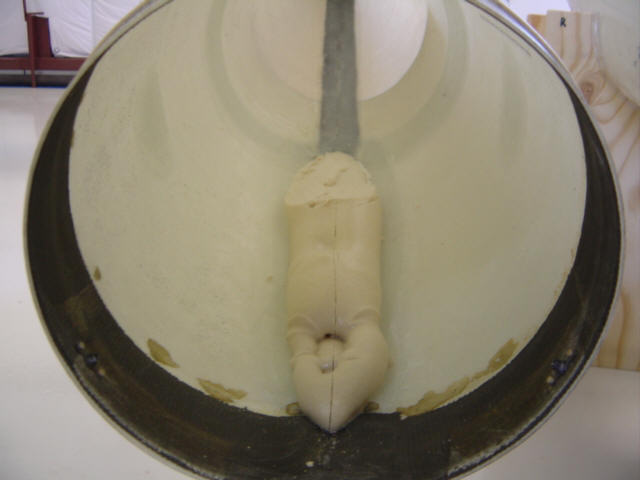
The first few steps involve finishing out the pod and pylon external plys. I started by sanding the intersection joints on the pylon, nose, and belly of the pod. Gary molded in depressions for the 3-ply BID glass strips to be laid-up into, but instead of glass...I'm using BID carbon fiber. I went with carbon for most of these structures to make the attachment to the wing much stiffer and help better "tune" the pods to the carbon Berkut wings (less flex). The carbon plys are pookied into the depression just like glass would be, all the way around the front pylon and pod. The trailing edge of the pylon is too sharp to bend carbon (or even glass) around, so a shear joint is used - just like the trailing edge of the wings. Nothing to do for now but watch the epoxy cure overnight. Step one complete.
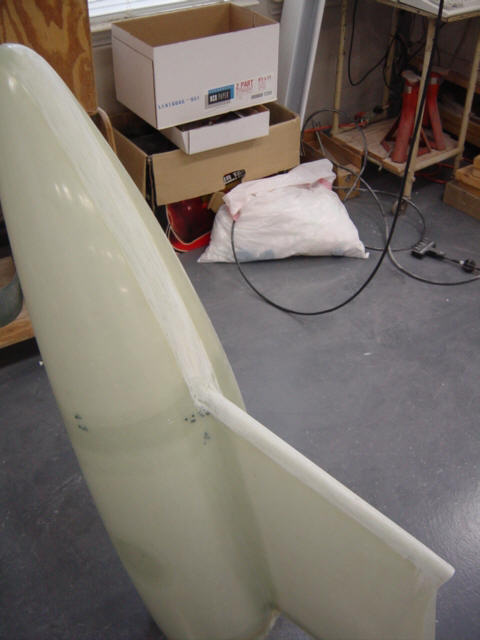
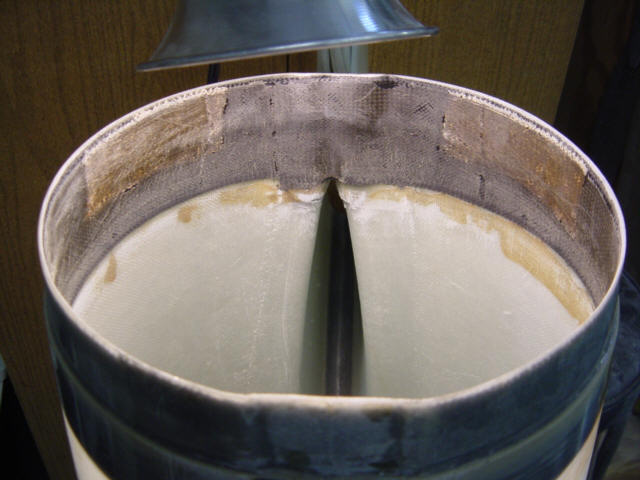
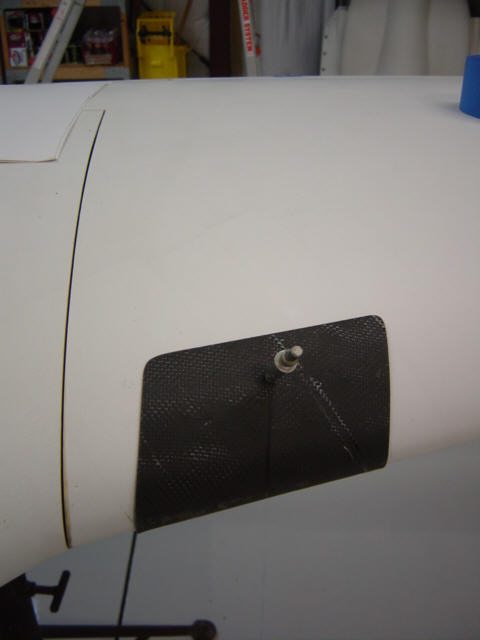
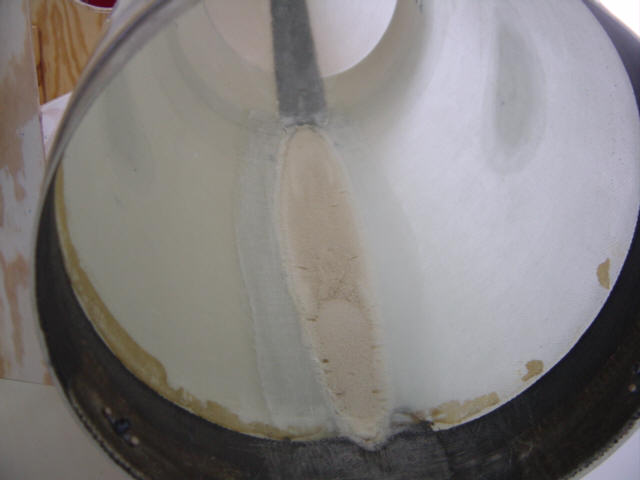
The next morning, I sanded off the stickers from the carbon tape edges and contemplated what to do next. I noticed that I had a nice carbon frame around the outside of the pod and pylon, but nothing connected the top and bottom carbon strips at the aft opening - this needed to be a carbon "cage". So I added the same 3-ply carbon strap to the inside of the opening and complete the carbon cage. I peel-plied these lay-ups, used a heat gun to minimize the excess epoxy and setup some lights to speed up the cure time. After this lay-up was semi-cured, I removed the peel-ply and trimmed up the edges. Notice, I didn't forget to add some BID glass as an insulating ply for the next step. Since the strength of the structure was not important at this stage, I moved on the same day, while the lay-up was still a little green. I positioned the
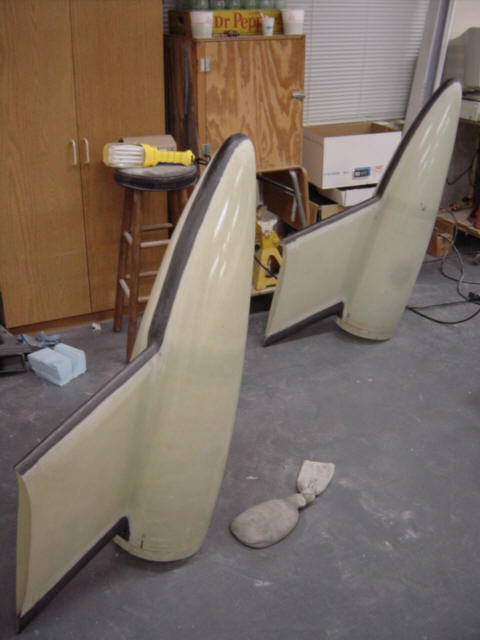
tail cones back in place, drilled 3 pilot holes in each pod, and used clecos to hold it all together. Then I opened the holes one by one and installed the nut plates. A few screws later...and the external carbon cage structure was complete. Now, the rest of this project will take place out at the hangar.
With the base pod and pylon completed, it's now time to attach them to the Berkut's wings. The attachment methodology I used is basically the same as on the Long-EZs, but with a few tweaks. First of all, the Berkut is a full foot longer than the Long-EZ and almost impossible to load too far aft. So, I planned to shorten the pylon at least 2" to bring the center of mass further aft, and also reduce the moment arm of the pylon itself. In addition, I wanted to mount the pylon/pod 1" further outboard on the wing to get it away from the retracting landing gear and affectively move the assembly even further aft (due to the sweep of the wing). I also planned to take advantage of the ultra-stiff and strong aileron cut-out channel on the Berkut wing by extending the mounting saddle all the way back to the aileron trough. You will see all of these mods in the coming sections - all of them worked very well.
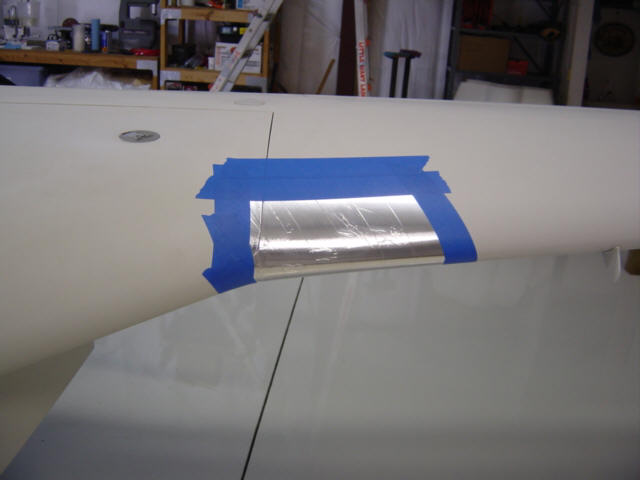
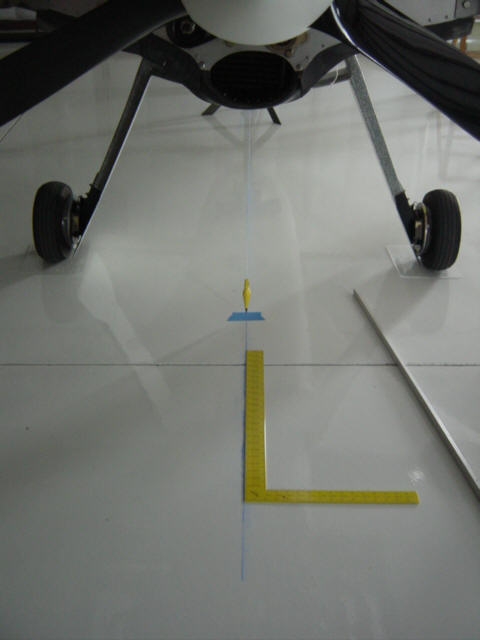
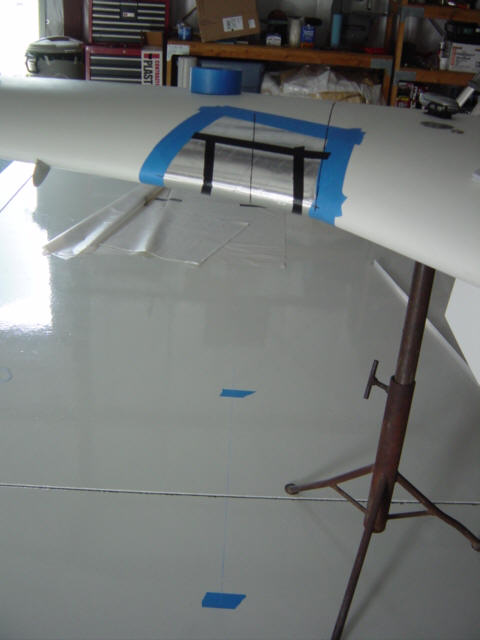
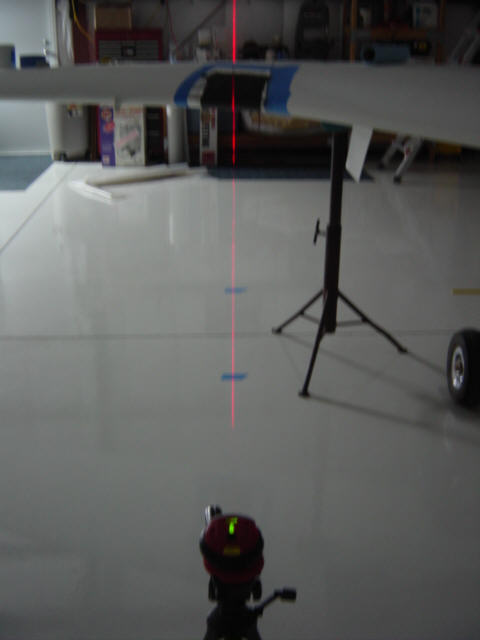
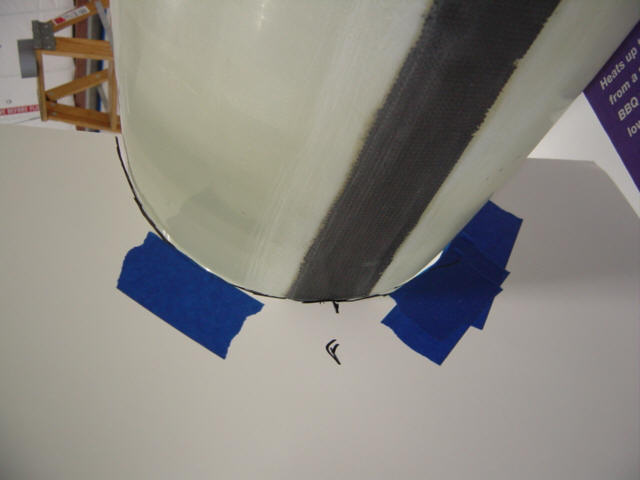
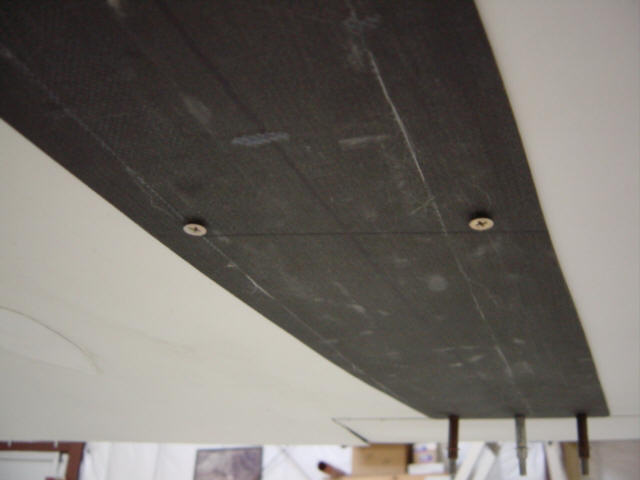
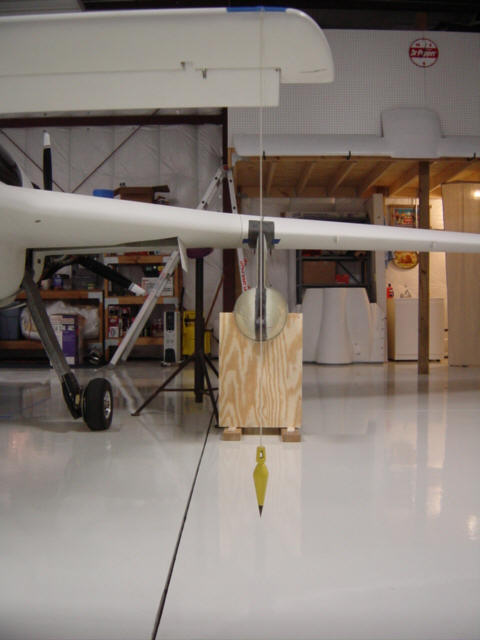
The main attachment to the wing is in the form of a long strap, or saddle that forms a "cuff" over the leading edge of the wing and runs aft past the end of the pylon. The plans call for BID glass to mate with a Long-EZ glass wing. I'm going with...you guess it, carbon BID to mate with my carbon wing. I used the Berkut's wing itself as the mold for this lay-up, but I first had to add strips of aluminum tape to the leading edge and underside of the wing in the general area that the strap would be located. I applied mold release wax to the tape and bordered it all with blue painter's tape to protect the wing. Next, I put the Berkut up on jack stands and leveled her on all three axis. This step it extremely important since it sets up the alignment for everything in the coming process. Next up, I dropped a couple plumb bobs and snapped a chalk line of the center line of the
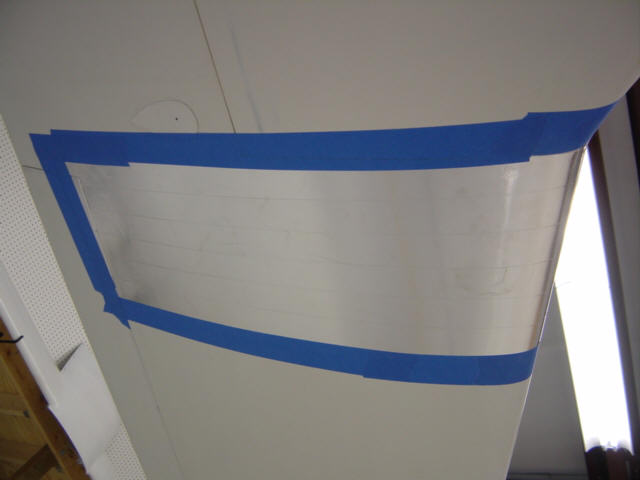
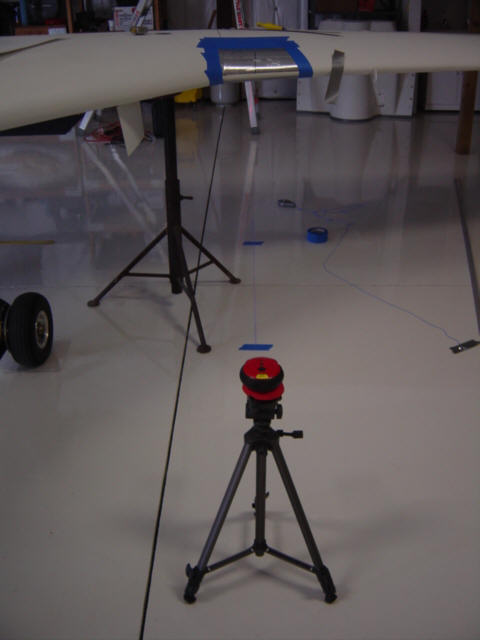
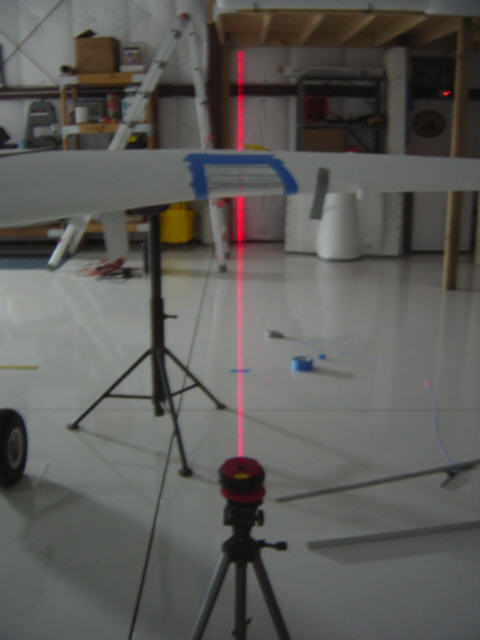
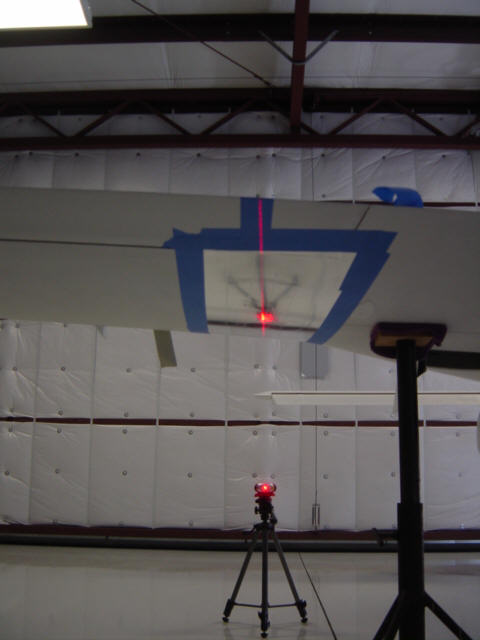
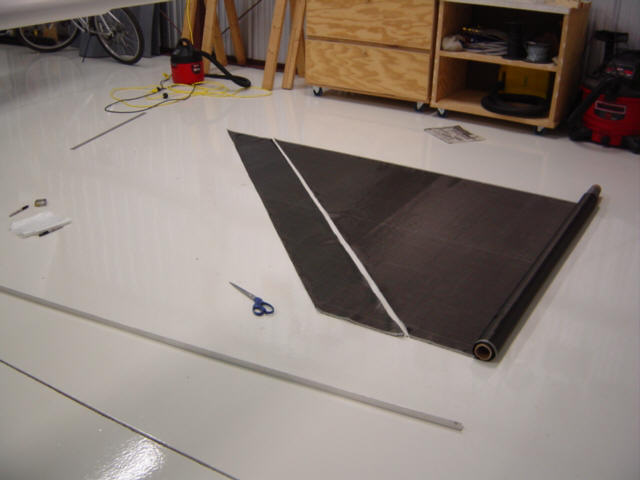
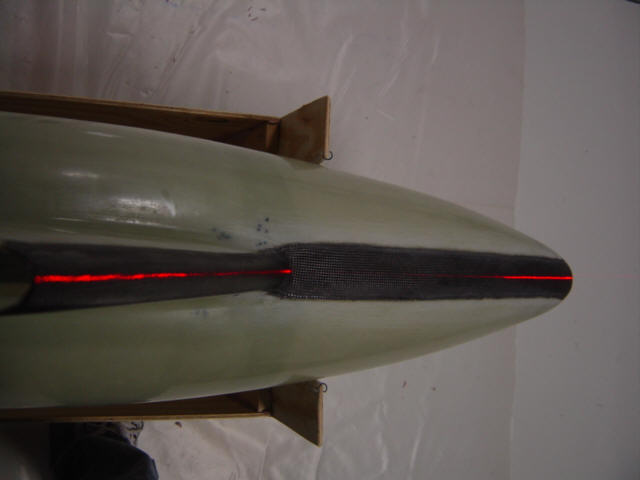
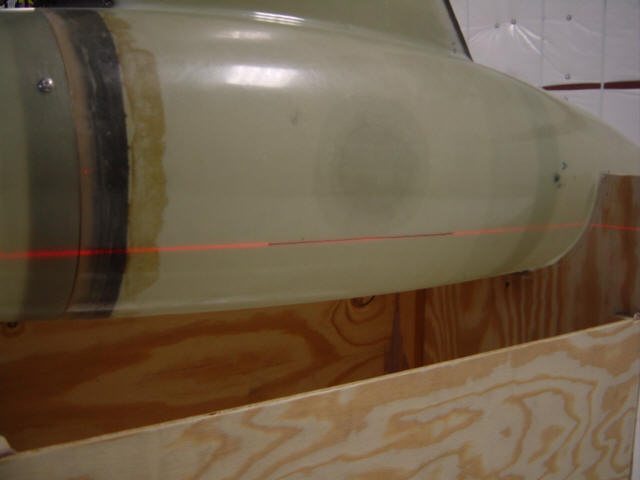
airframe on the floor. From there, I measured the distance outboard where the center of the pylon would mount, and snapped parallel line describing the pod's centerline on the floor. Why on the floor? Well...here's why - so I could use a wonderful little tool called a laser level!!! Man this thing is awesome and I have no idea how I could have done this project without one! It's the best $25 I've spent at Sears in a LONG time. All I had to do is line up the laser line with the chalk line on the floor, and it shot a perfect scribe line onto the complex curve of the wing. I used a sharpie to trace the line all the way back to the aileron. So easy! Then I measured out from the center line mark 3" on both sides and used some electrical tape to indicate the edge of the strap perimeter. (the tape will mark a cut-line in the cured strap I'll use later) Here you can see the relationship of the chalk line and the strap. I cut up enough carbon for 8-plys on each strap (note the joggle for the leading edge taper) I laid up all 8 plys on clear plastic sheet and transferred it to the wing. Using a squeegee, I worked out all the air bubbles, and used a heat gun to wet the last ply. It was a little bit of a challenge to do with by myself, but I managed OK. Some peel-ply later, and it was wait for cure time again.
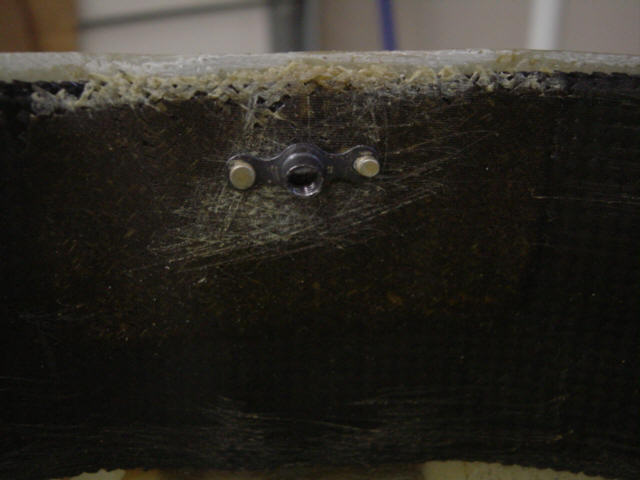
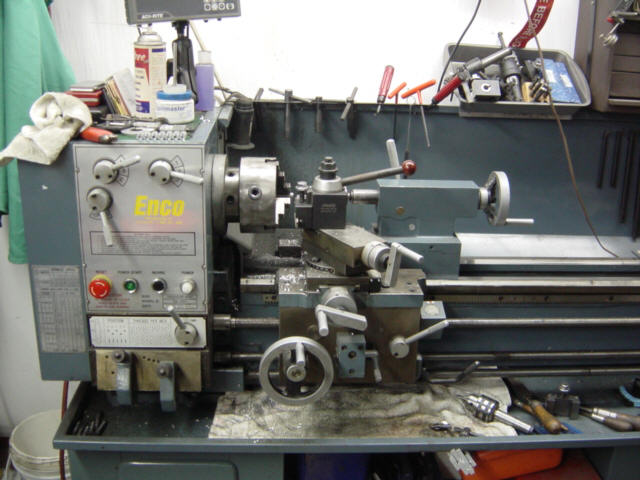
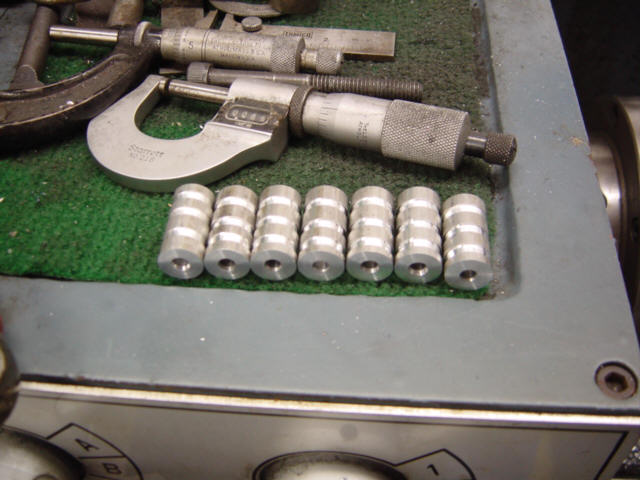
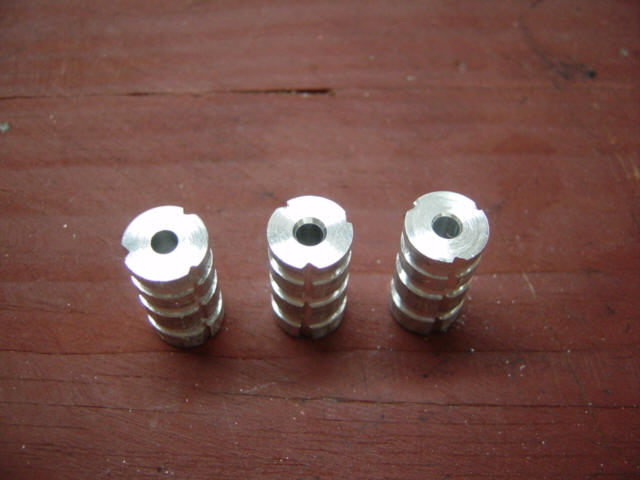
This didn't take nearly a long as I thought it was going to, so I walk down a few hangers to Chuck's place and borrowed the use of his metal lathe. Time to make the hard-points! The hard points are similar to the standard plans, but my install method had to be different as you will see. The hard-points are simple - chunks of 1/2" aluminum bar stock that has been center drilled and has had grooves cut into the sides. The hole will eventually be tapped 10-32 for the attach screws and the grooves are to help the flox bond better. In addition to the round grooves, I chucked them up in the vice and filed some lateral grooves in them to help resist turning. The final product looks like this. I setup a couple of small heaters and left the straps to cure overnight.
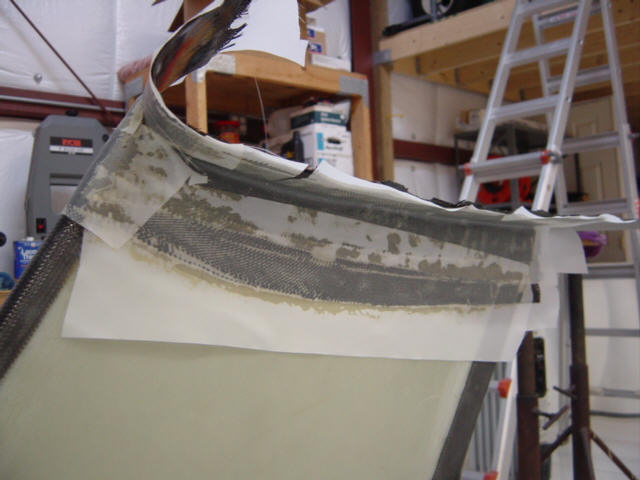
I removed the peel-ply the next morning, but there were a couple of things I had to do before removing the strap itself. I got the laser level out again, and shot the centerline on the straps and marked it with a sharpie. I also drilled holes and installed two clecos per strap to act as indexes. I removed the straps, cut them roughly to size (using the electrical tape markings) and re-installed them on the wings using the clecos. These straps are only half as thick as they are going to finally be, and they are mondo-stiff! Oh, I love carbon fiber...but I HATE working with it. I'll be itching for 3-weeks due to the dust generated from cutting and sanding the stuff! YUCK!
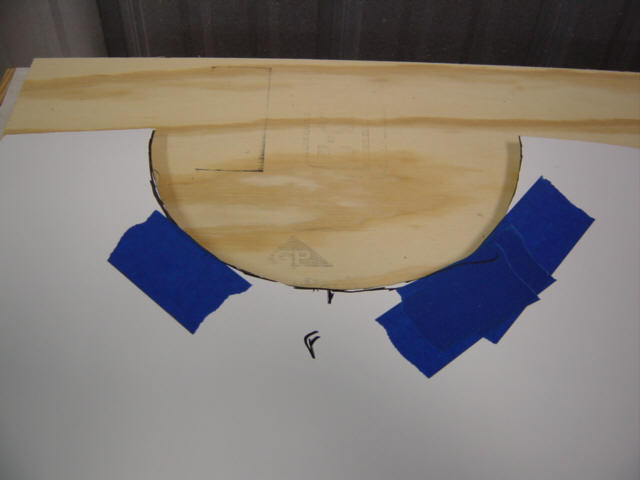
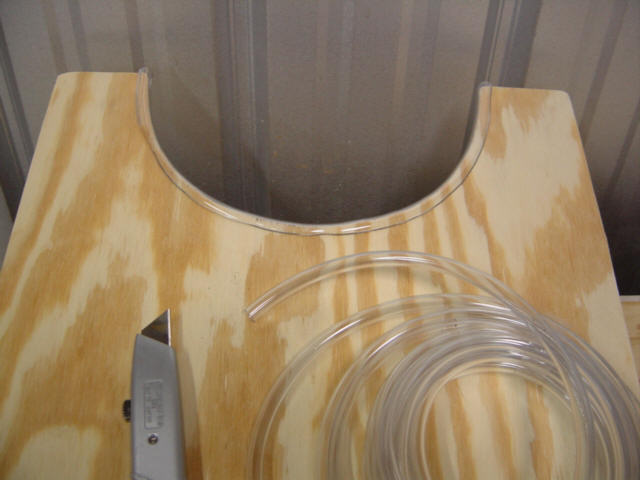
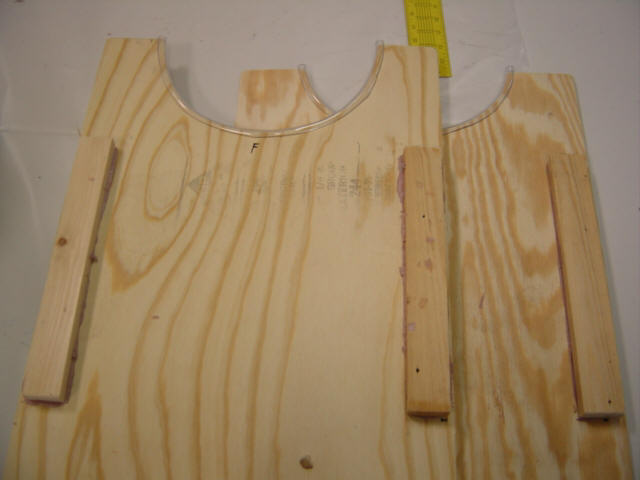
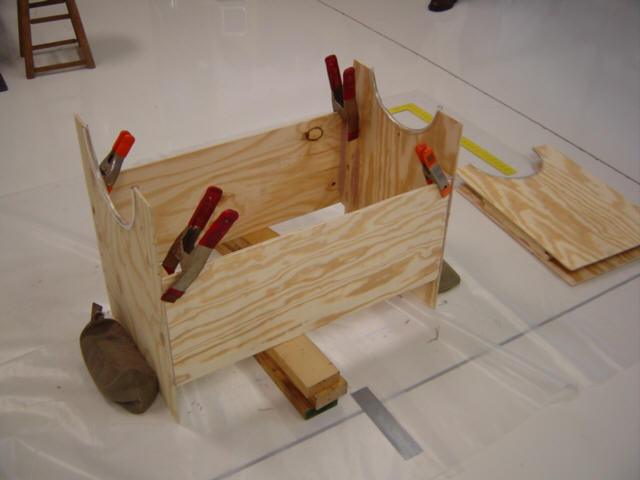
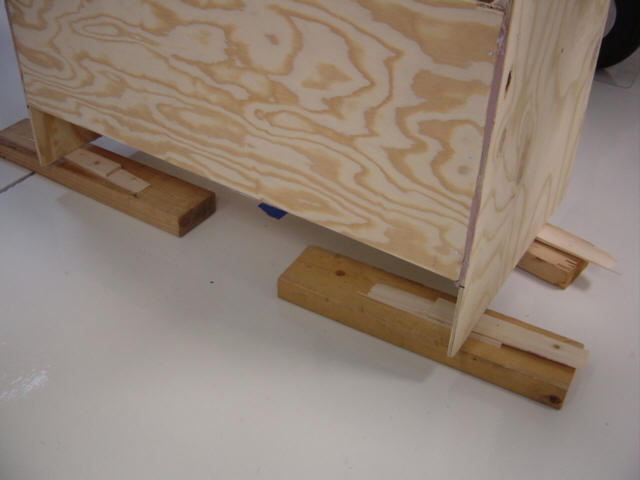
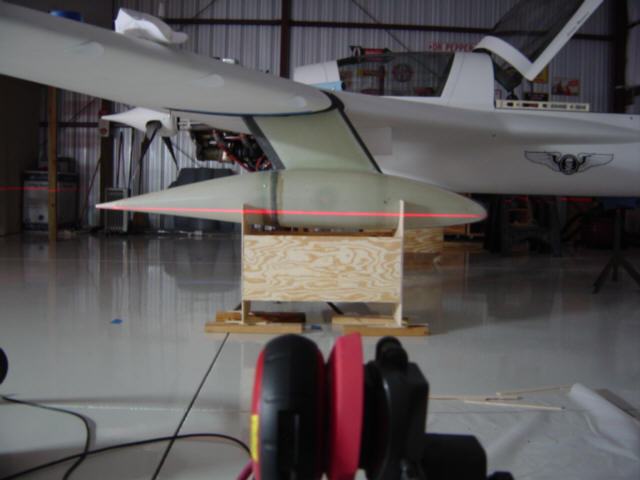
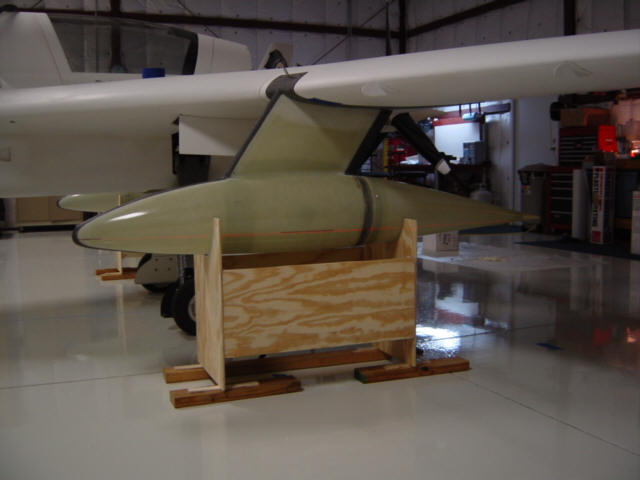
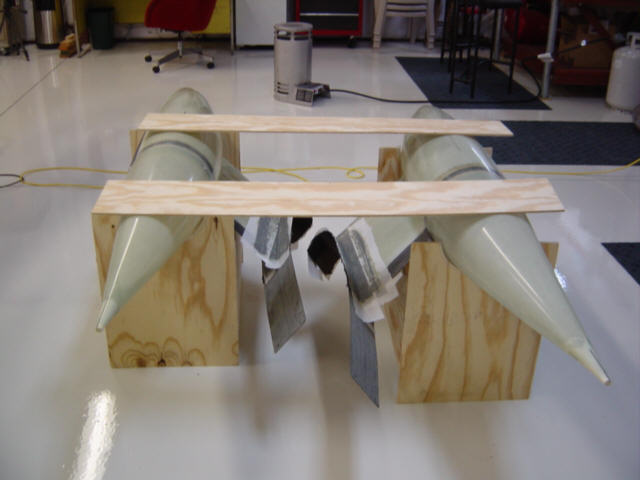
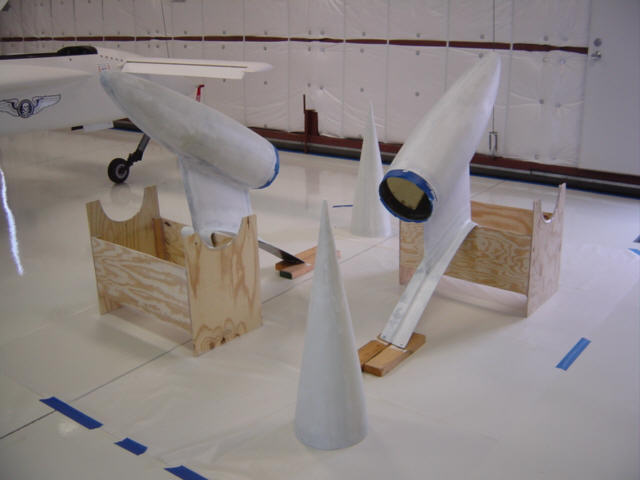
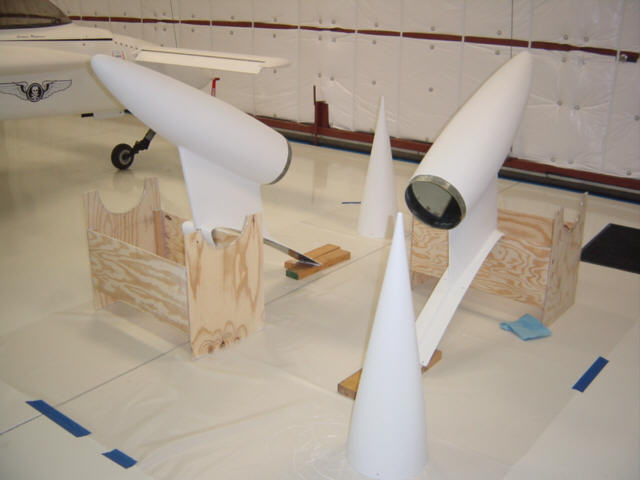
I got a chuckle out of the next sentence in the plans - "Make a couple of cradles for the pod to support them under the wings." That's all the "instruction" you get. What shape?, Out of what?, How tall?, How wide?, What part of the pod gets supported?, etc. etc. It was all up to the builder to decide. So, I did some head scratching and came up with the following. I first made some paper templates of the pod's profile in the areas I figured needed the support. I went to Agent Orange (Home Depot) and bought some 1/4" plywood and some vinyl tube. I transferred the template shape onto the plywood and cut them out. I slit the vinyl tube and slipped it over the cut-out area. I made sure it still fit the pod and did the same thing with the aft end. I jammed it all under the airplane for a quick and dirty trial fit and they seemed to work.
I had some old Bondo around, so I pookied a couple of scrap 1x2s onto the cradle ends, measured and cut some cross sections, then pookied them all together as a unit. Once hardened, I followed it all up with some edging nails for additional strength. Ta-da! cradles for the pods. I then used the laser level again to scribe the waterline on the pods themselves. Geez, that only took all day...and all for just ONE sentence in the plans. ;-) Oh well, I over built these cradles a little, but I figured I'd used them for pod storage racks as well. By the way, the vinyl tube is absolutely essential - it provides a little friction for the pod as it sits in the cradle - trust me...it's hard enough to get it aligned properly, you don't want it moving on its own!
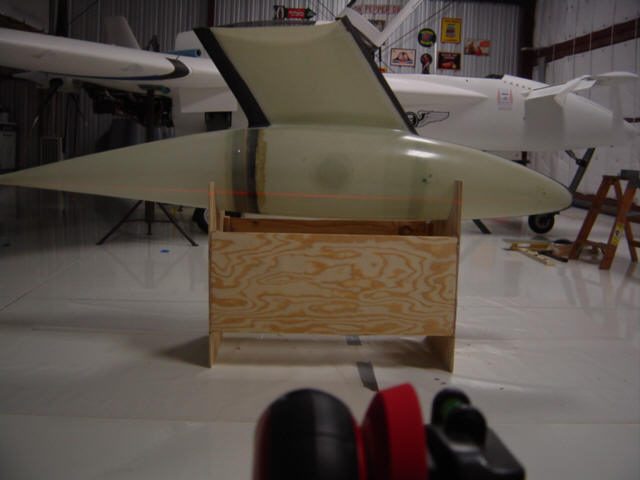
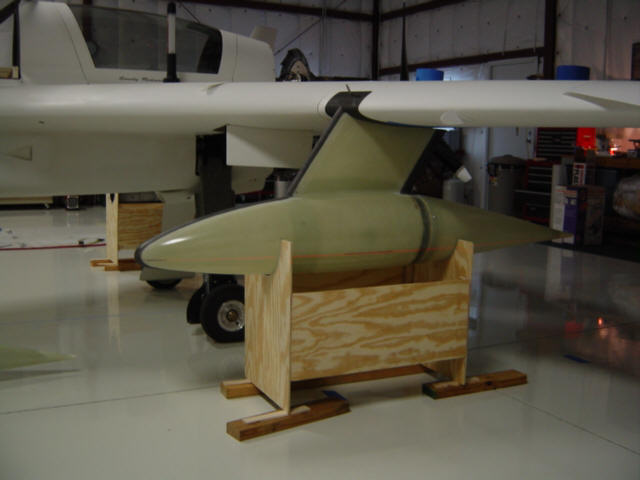
Now comes the hard part - getting pod aligned, adjusted, sized, and level...all at the same time. I started by whacking off a full 2" of the upper pylon. This was the "shortening" I spoke about earlier. Then I setup the pod in the cradle under the wing, and used shims to make fine adjustments to the vertical alignment, level on the waterline, center on the strap front, and strap rear...all while marking and trimming the interface between the pylon and the strap. Finally, after about 20 or so iterations, it was all lined up. I can�t imagine doing this without the laser level!! The plans recommended using a WATER LEVEL of all things. You could go completely mad trying to get that this done with one of those. Yikes! Oh well, that
thought was not nearly as bad as when you realize that you have to do it all over again on the other side! D'oh!
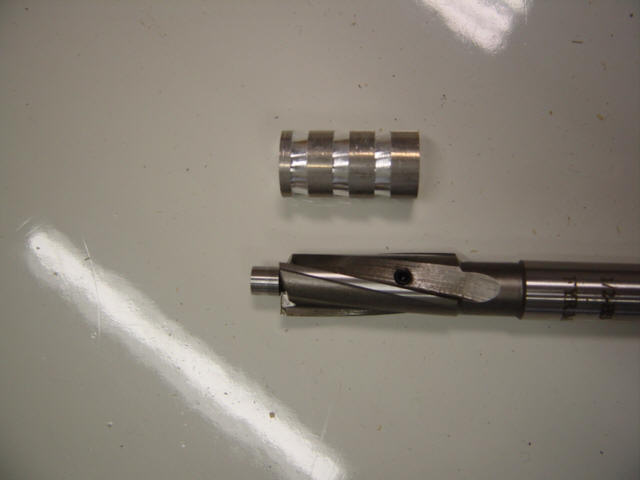
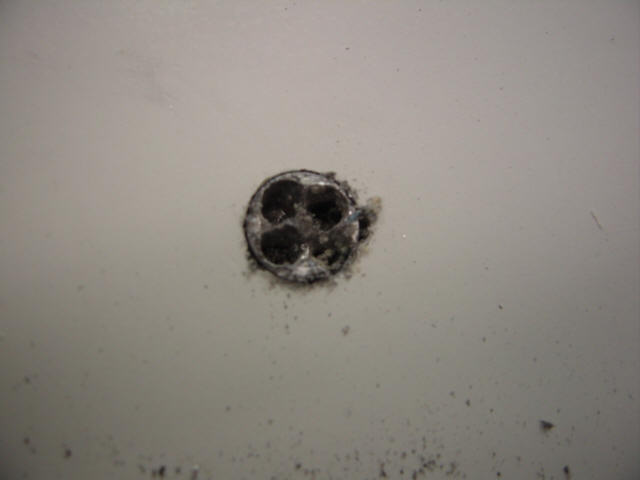
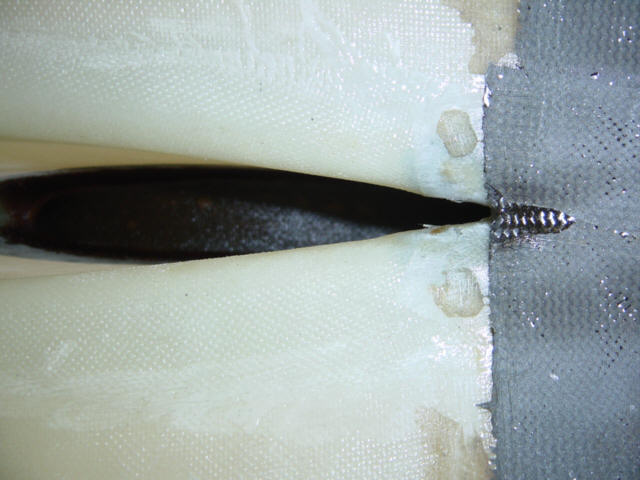
Now, with that pain behind me...I got to tear it all down and install the hard points. This process was very different from the plans, as the plans are based on a glass strap that can you can see through - there is no "seeing" through 8-plys of black carbon. I started by locating the spar and sheer-web face in the main wing. The center two hard points are located just in front of the sheer web and you don't want to go drilling into a spar cap! The aft two are located at aileron trough, and the front two are at the end of the cuff. I drilled small holes and installed more clecos to hold the strap securely. Accuracy here counts! I removed the strap and drilled the cleco holes out to 3/16". Why 3/16"? Because that's the size of the pilot on my counter bore bit! ;-) Since I could not see the pilot holes through the strap, I'd have to drill these blind. This way, I have a very accurate method of aligning the holes and installing the inserts. You see, the
counter bore is the same size as the aluminum inserts. So, when I bore the hole the insert is automatically centered exactly in line with the original pilot hole. I removed the foam from around the inside of the hole, used a little tape to protect the wing skin, filled the hole with wet flox, and installed the inserts into the flox. The flox oozes everywhere and fills all the voids and grooves. After a little clean-up, I put some painter's tape over the inserts to keep them from falling out. The final result was stunning! They were all perfectly level with the wing skin and looked great! I drilled out the flox from the center holes, counter sunk the upper two and began running a 10-32 tap down each of the inserts to thread them for the mounting screws. The first strap came out
perfectly and every hole was precisely located. The second one didn't go so well. Just as I was about to finish tapping the second insert, the tap broke off in the hard point! HOLY CRAP! Now what!?! I tried a futile attempt at extracting it...no dice, more just broke off. So, the only option was to perform surgery and remove the hard point itself. I began by drilling away as much of the aluminum as I could. I was about half way through when it began smoking from the heat. The insert was getting really hot! This really saved the day - the flox was only partly cured and the heat softened it up. I was able to get the pliers out and wiggle/twist the insert until the flox finally yielded and it came out of the wing. It didn't come out without a fight...and I'm at least positive that these things are not coming out on their own! Luckily, I had made a few spare inserts so I
quickly prepared the area and re-floxed a replacement into the wing. The next day, the only evidence all this happened, was a slight increase in the amount of flox bordering the insert. Other than that...it was good as new. Whew!
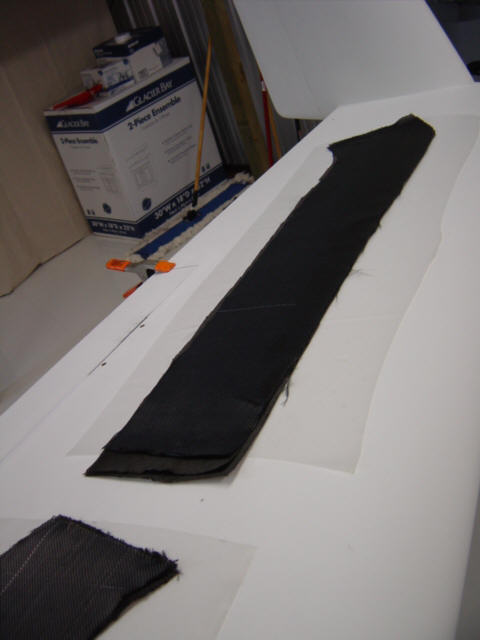
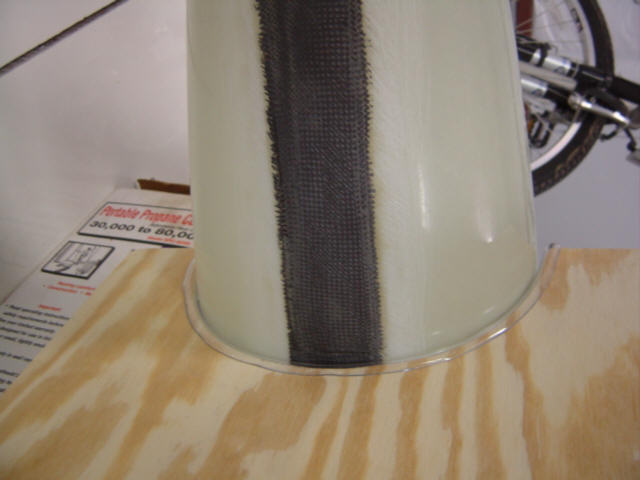
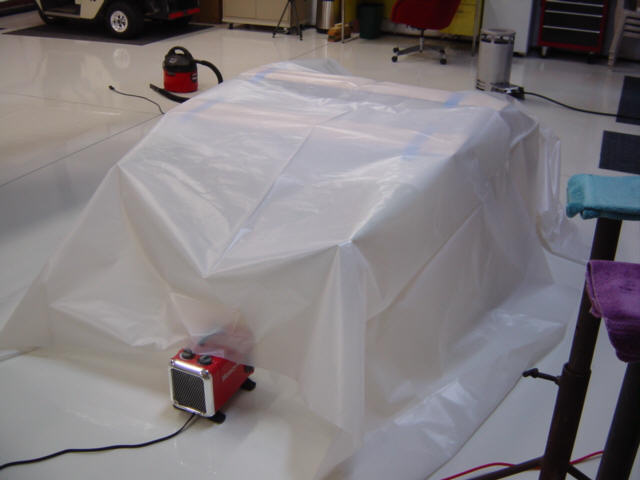
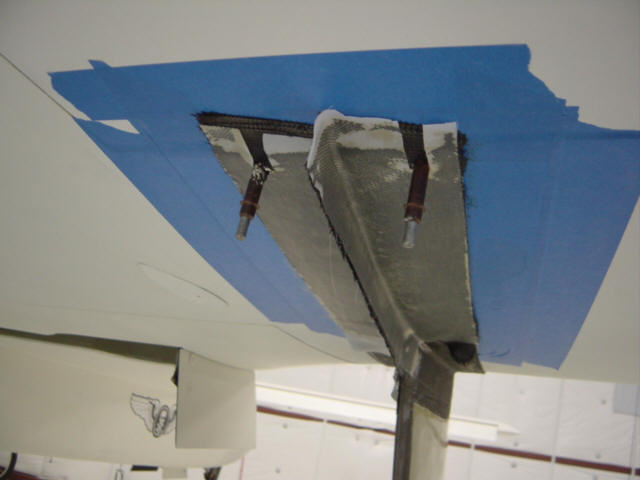
It's mounting day! I got the pods all jigged up under the wings, double and triple checked alignment - I even dropped a plumb bob off the canard to check vertical alignment. It all looked great so I tacked the pylon onto the straps with 1-ply strips of carbon. This is only temporary attachment so the big lay-ups can be done off the plane. So...once again...I watched the epoxy cure. The next day, I removed the pods from the wings, and applied 5-plys of BID carbon to each side of the pylon up and onto the strap and added peel-ply. I didn't want to waste another day, so I laid the pods down in the cradles, put a couple boards across the tops, and made a heat-tent and cooked them to accelerate the epoxy set time. A
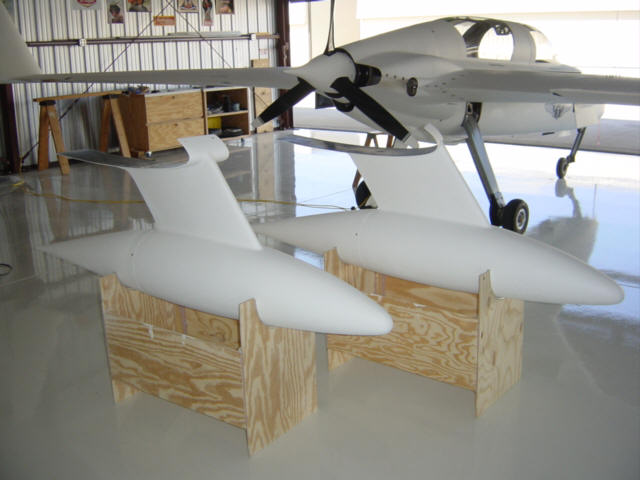
few hours later, I took the peel-ply off and now I had some beautiful raw carbon pod saddles. Man, that carbon is sexy! I even did a trial hang on the wing! Super sexy! But, we still not done yet!
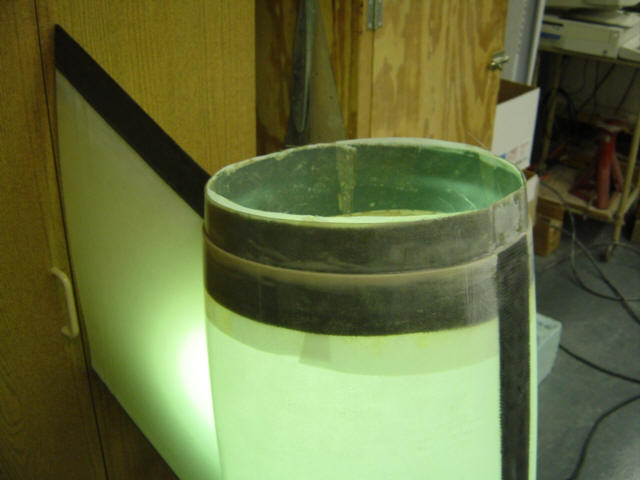
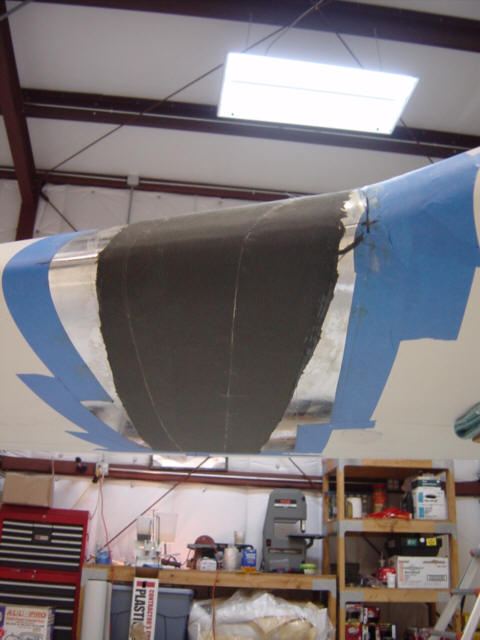
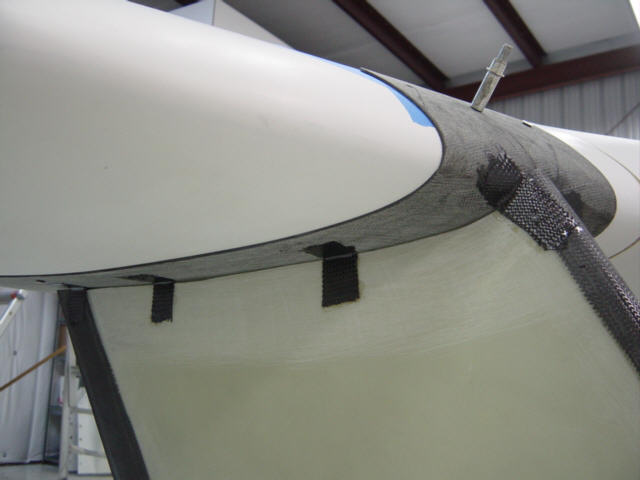
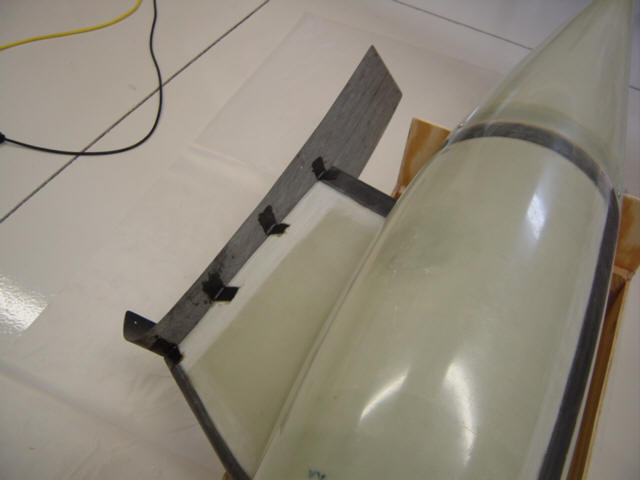
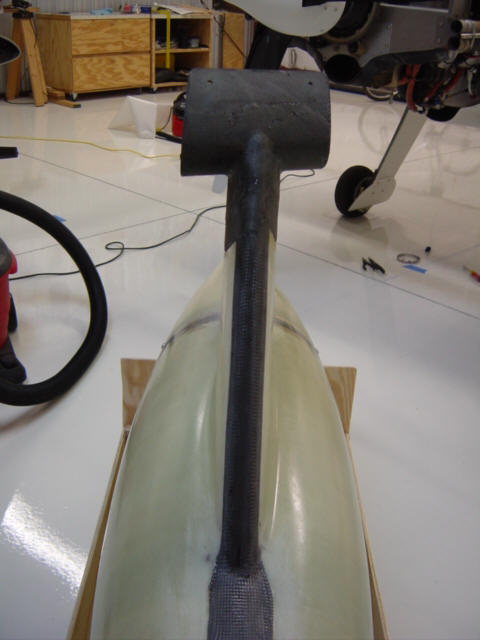
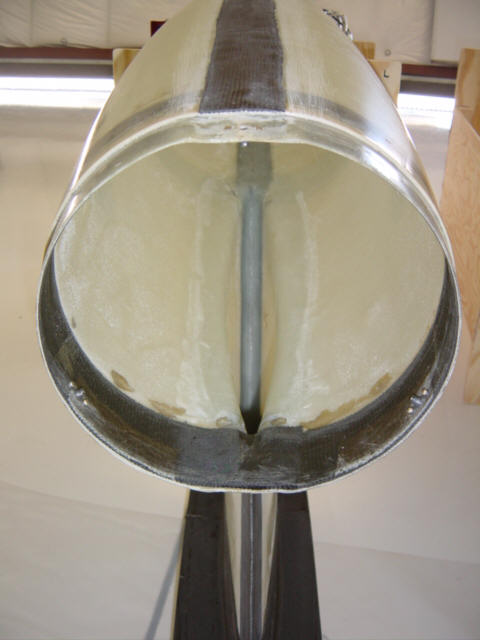
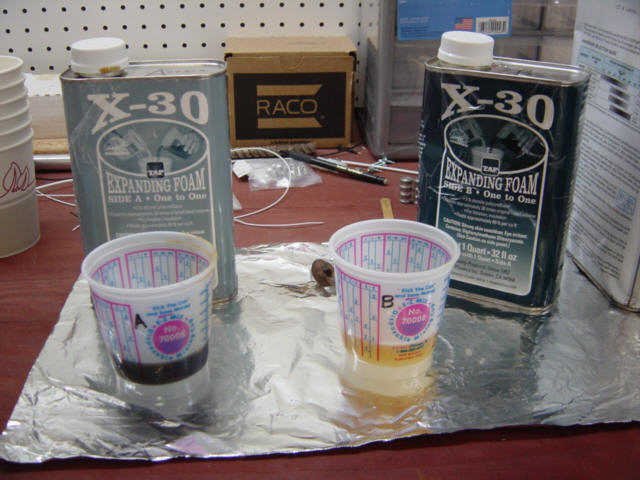
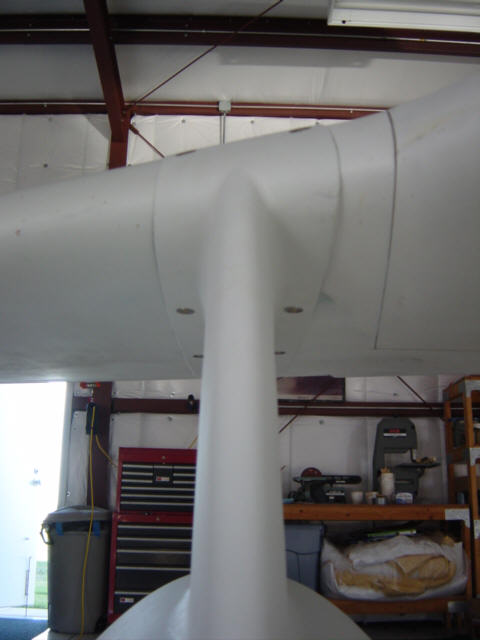
I took the pod off the wing and flipped them upside down. With the aid of a special tool, I managed to get the internal 3-ply BID (glass this time) tapes down into the hollow pylon and smooth it out onto the saddle and the inner sides of the pylon. It was not easy, but I did manage to get it in there. While it's still wet, I mixed up some X-30 grow foam and poured it into the pylon. The foam expands and presses the lay-up into the corners and fills the pylon up. It took about 3 applications, but the foam did it's job. When it's done growing and has cooled off, I cut the foam down and capped it off with 3-ply carbon. This makes a box structure out of the pylon and stiffens it up substantially.
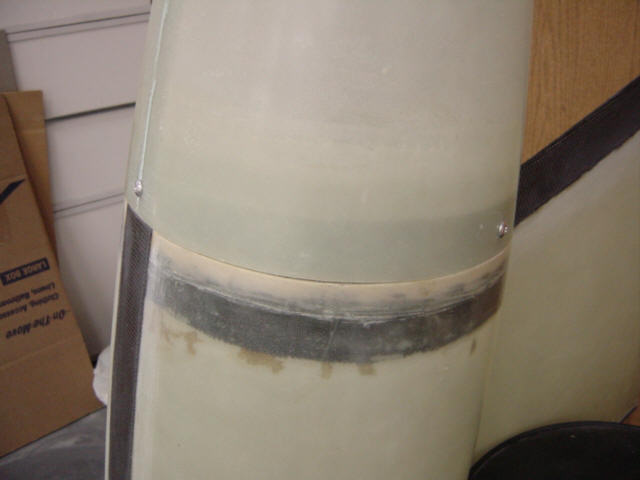
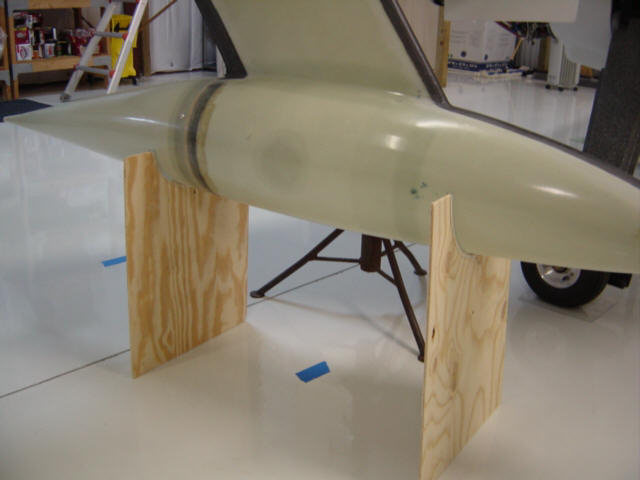
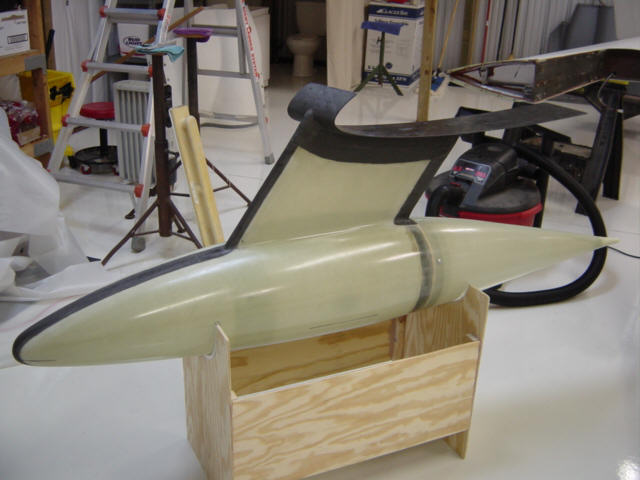
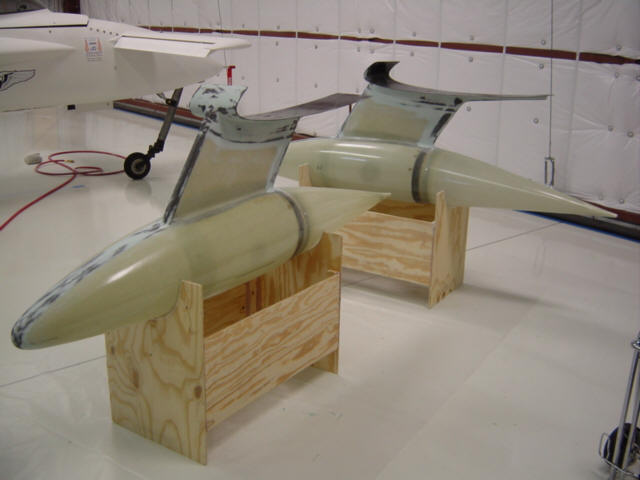
While all that was curing, I put the tail cones back on and prepped for the final lay-up. A 4-ply per side keel that adds stiffness to the aft length of the strap and connects the middle and aft hard points together. I let it all cure over night, and the next day I had structurally complete pods!! Note the keel on the aft section.
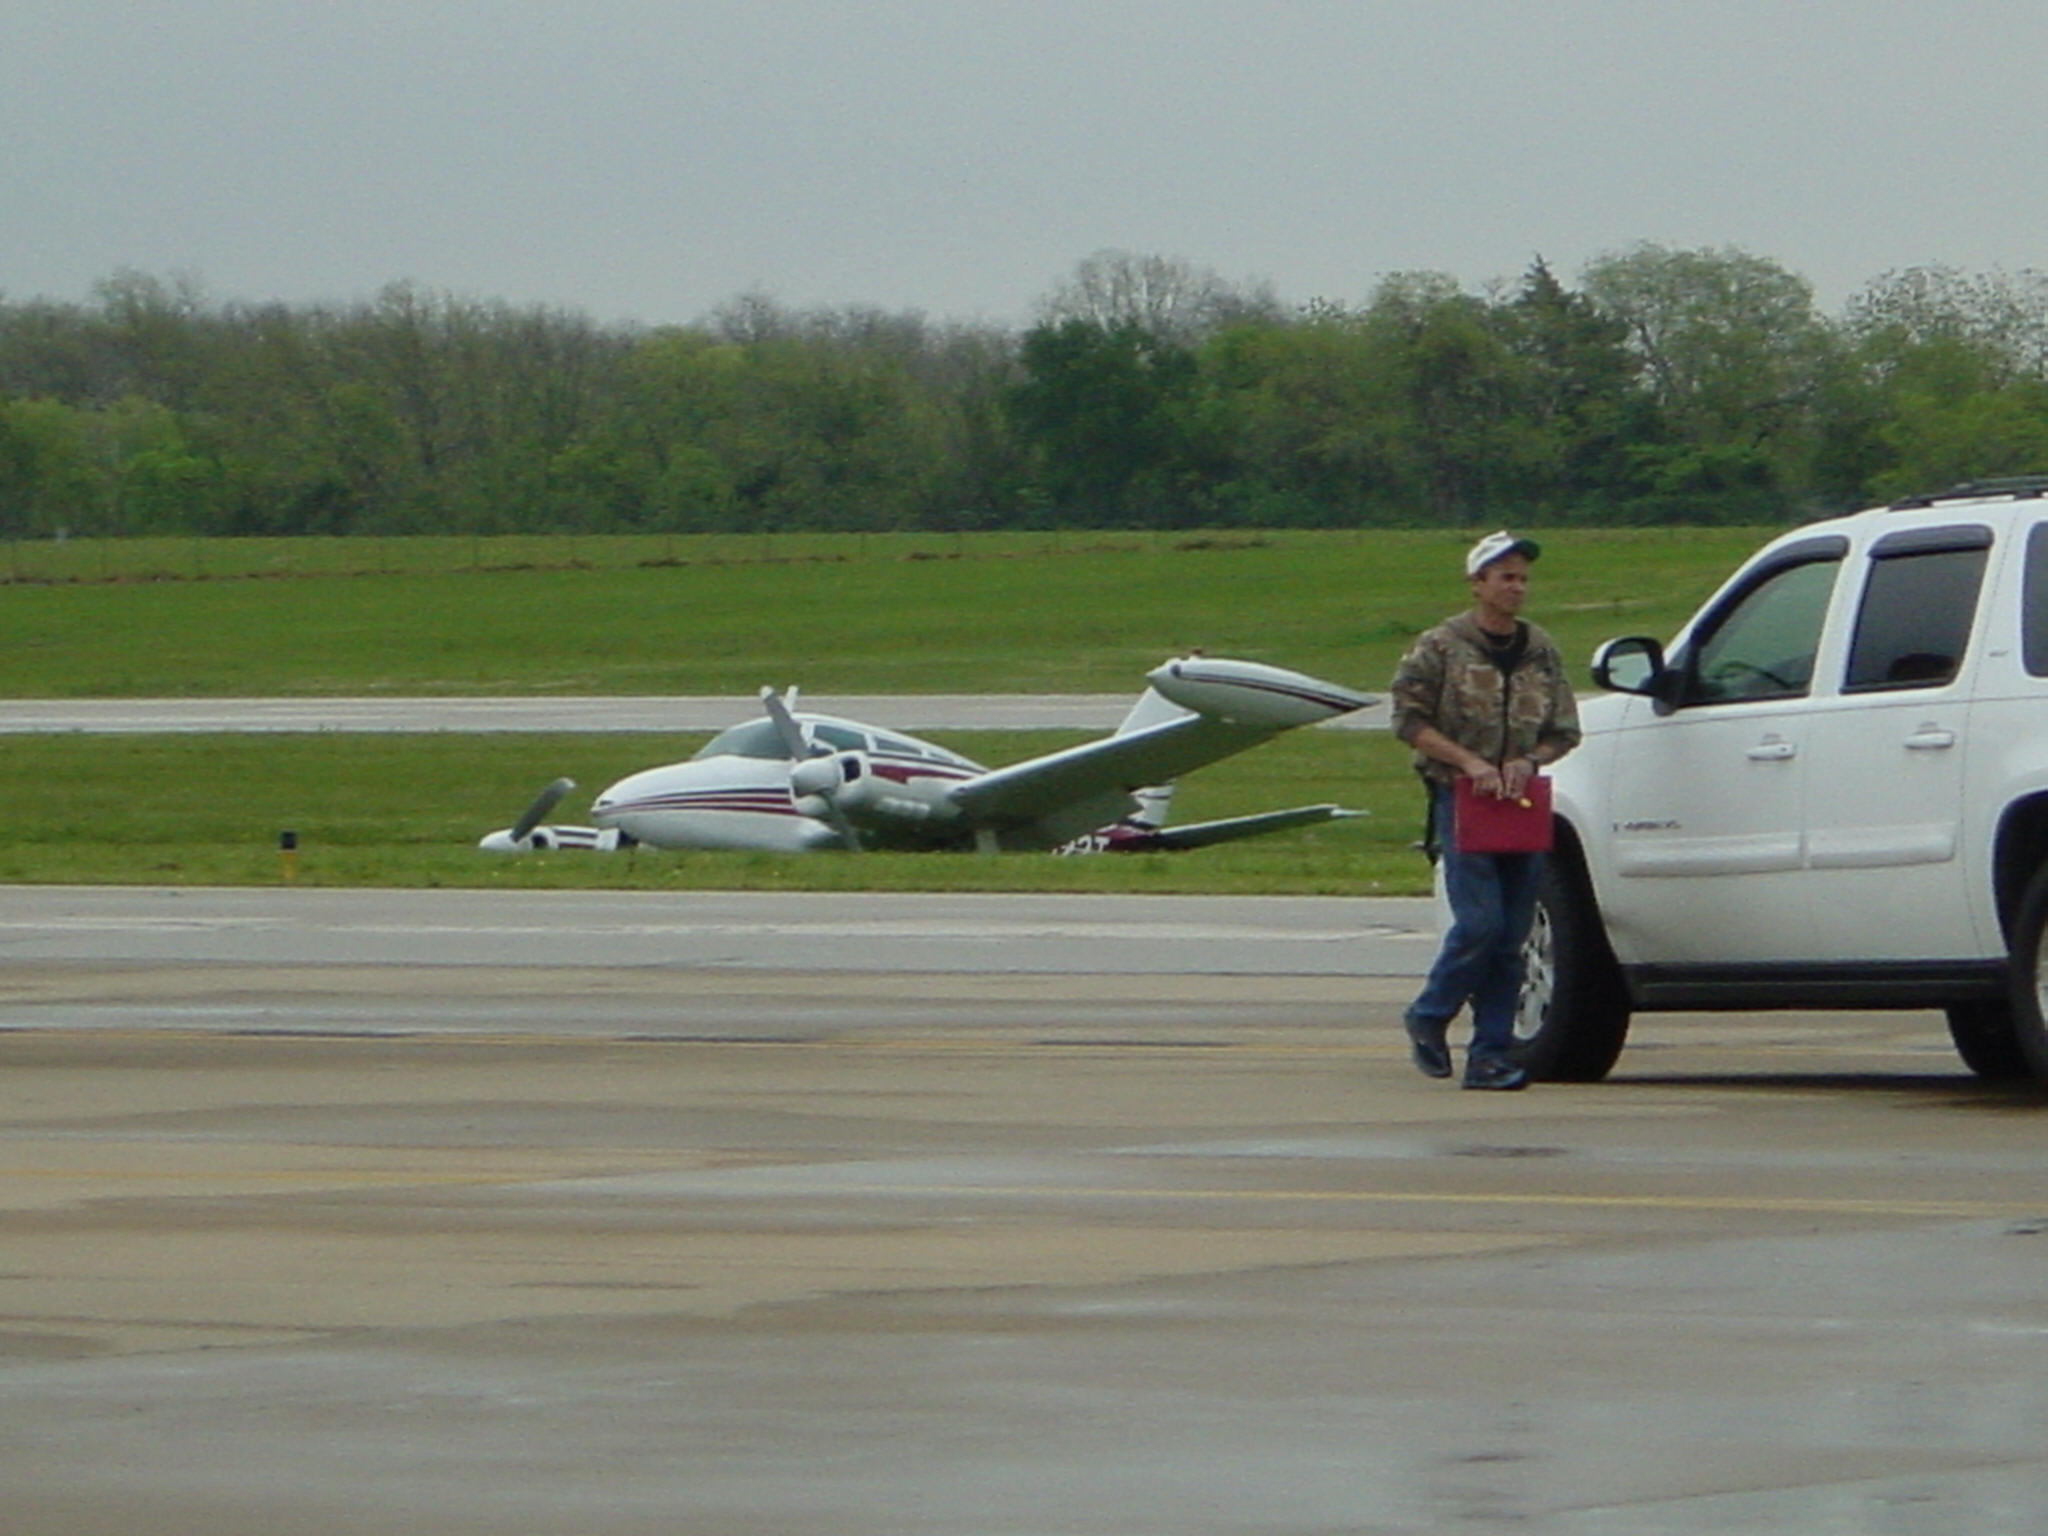
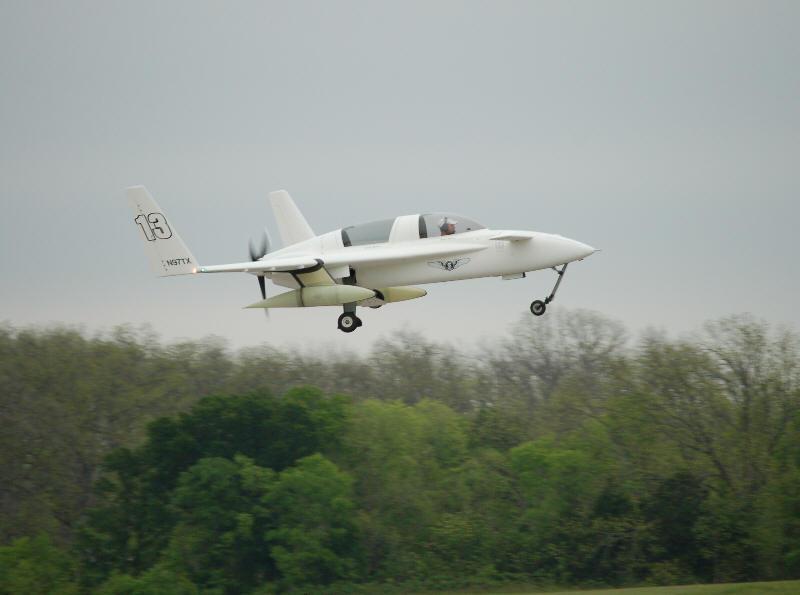
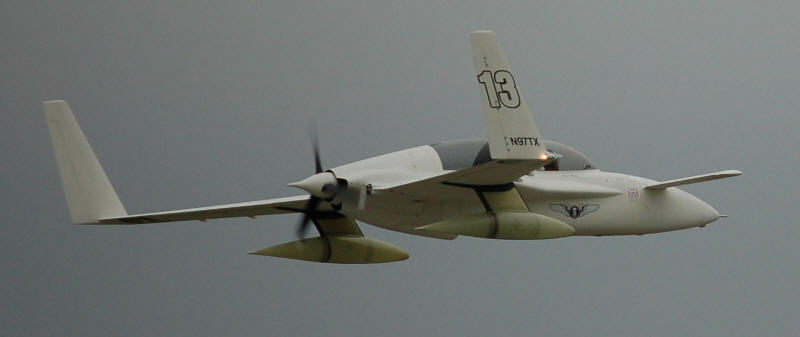
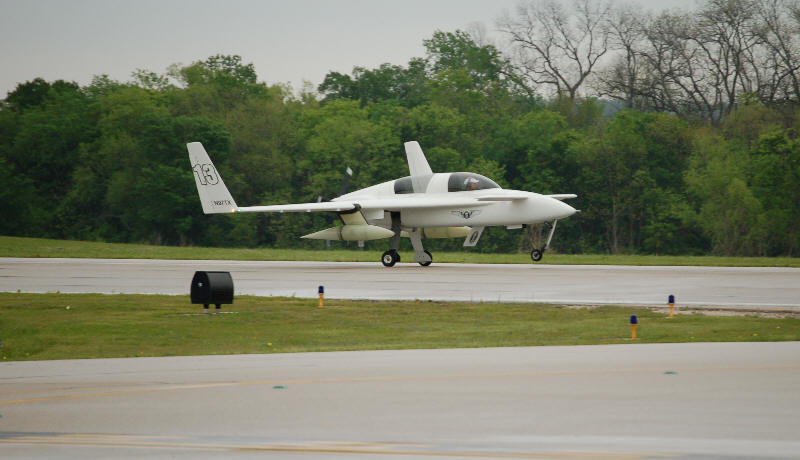
Needless to say, it was time for a test flight! I strapped the pods on the Berkut, waited for a break in the rain...and blasted off! I stayed in the pattern and I was the only thing flying for 15 miles...the low ceiling and cross wind was a little tricky. Dave Wilson took some pictures as I flew around and did a low approach (high speed test) and came back around for the landing. The winds shears felt like someone kicking the aft end of the airplane...and the pods changed the whole vibration of the airplane...but it was a completely successful test flight. However, a plane that landed right after me was not so lucky. Something must have caused his right gear to collapse since he dinged up the prop and wing pretty good. The good news is that no one got hurt and the plane will live to fly again. I caught a picture of the local fire guys
logo. Cute, huh. Anyway, time to finish these babies up!
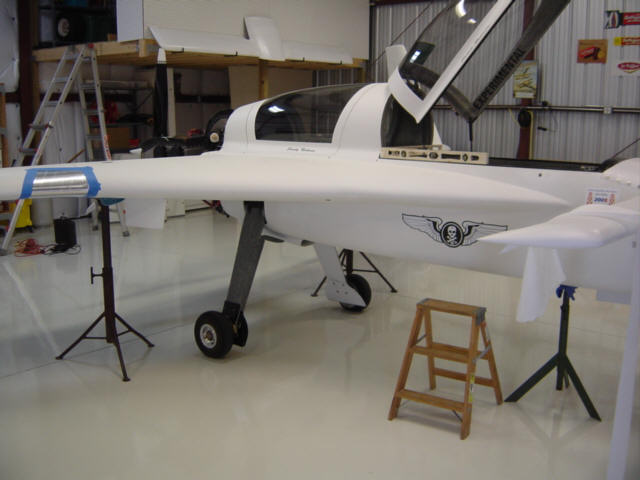
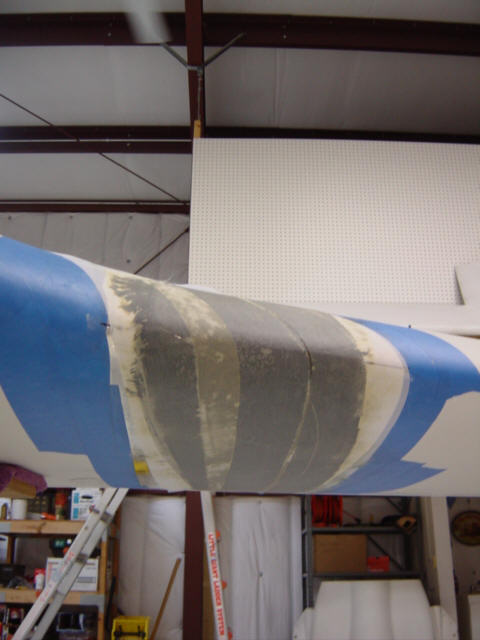
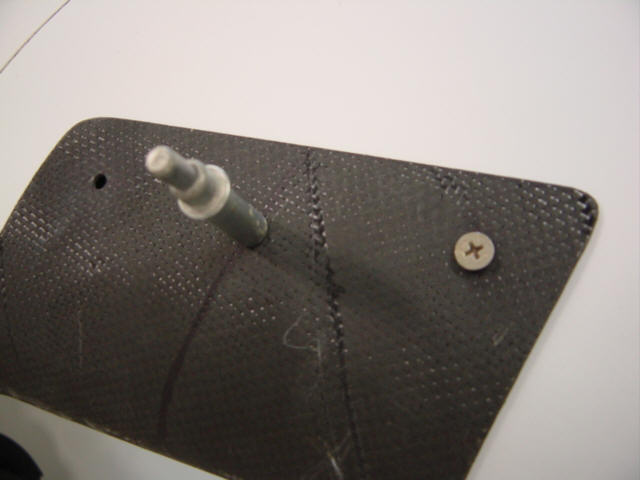
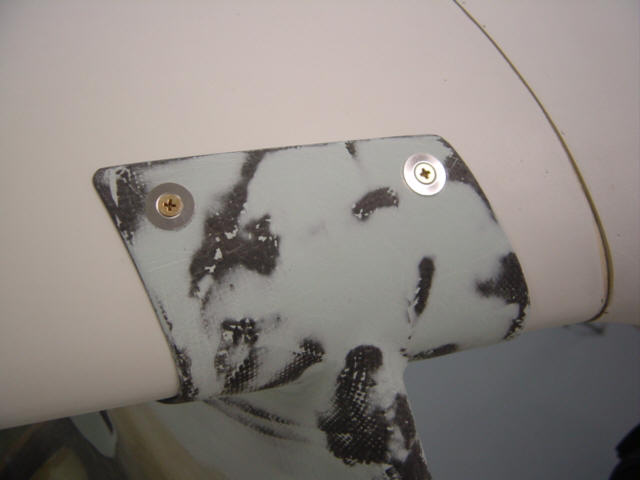
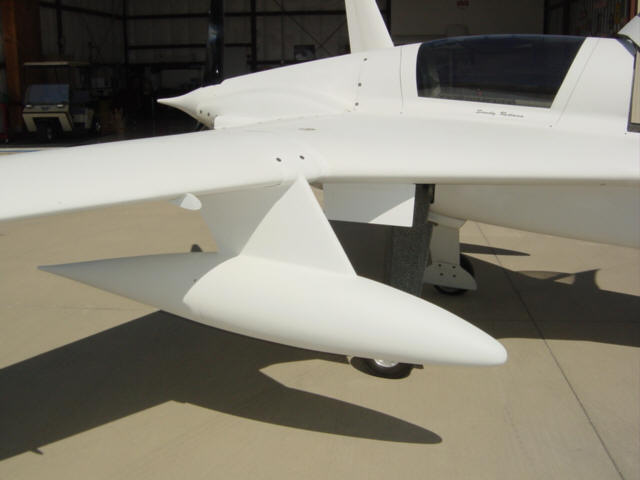
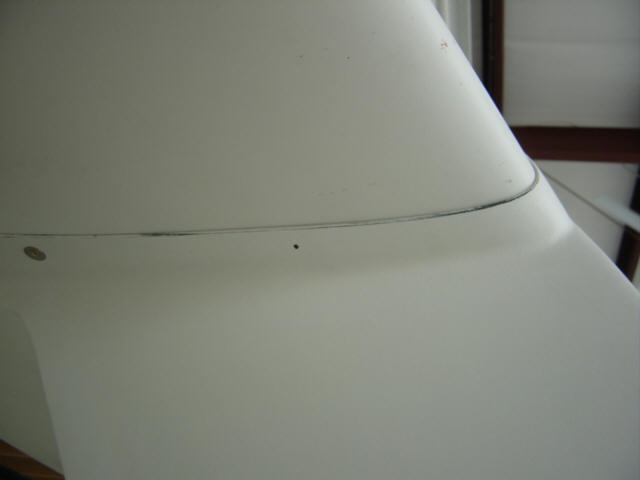
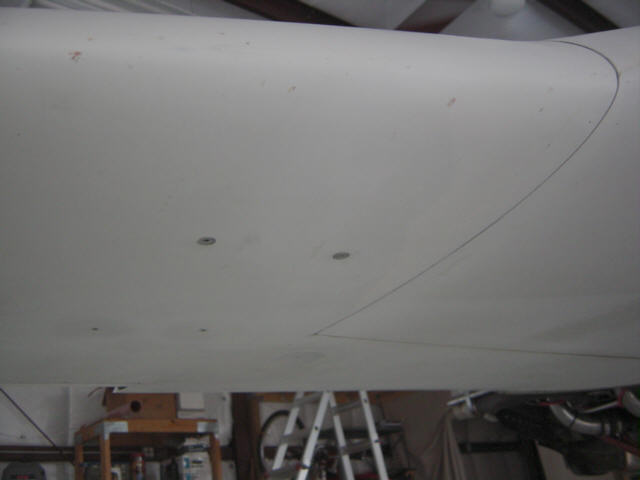
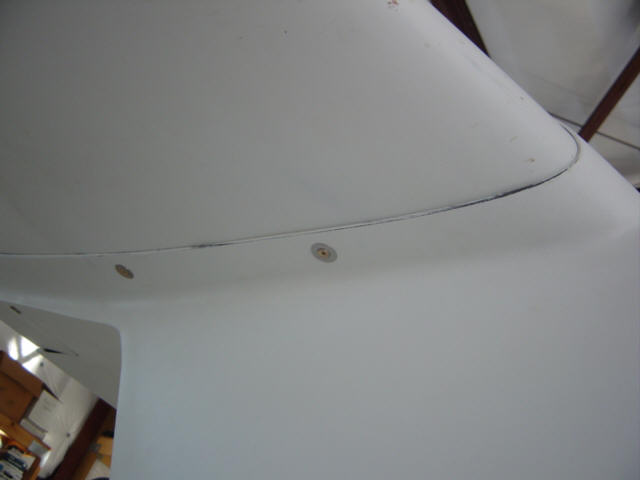
I spent the next two days filling and sanding until they were finally ready for primer. In-between coats of UV Smooth Prime, I countersunk the saddle for flat screws, and match drilled and installed nut plates in the aileron troughs. After several coats, I let the primer dry for a couple of days.
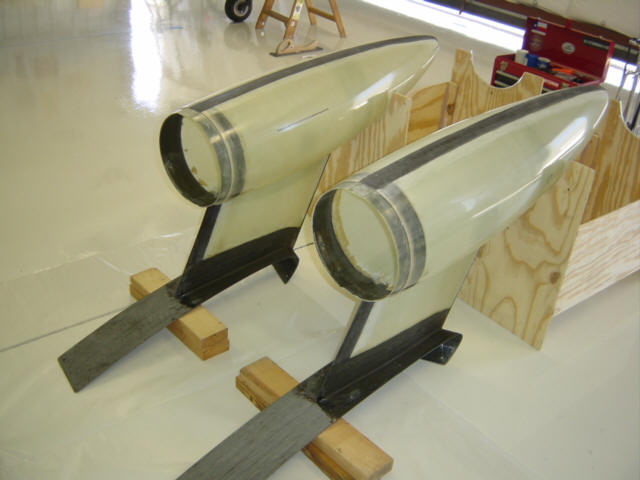
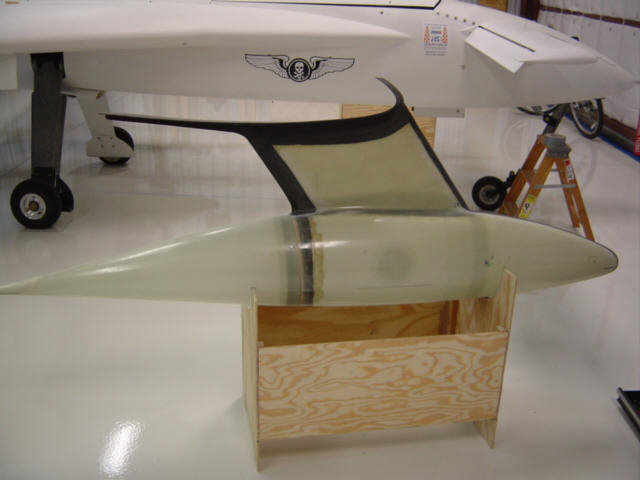
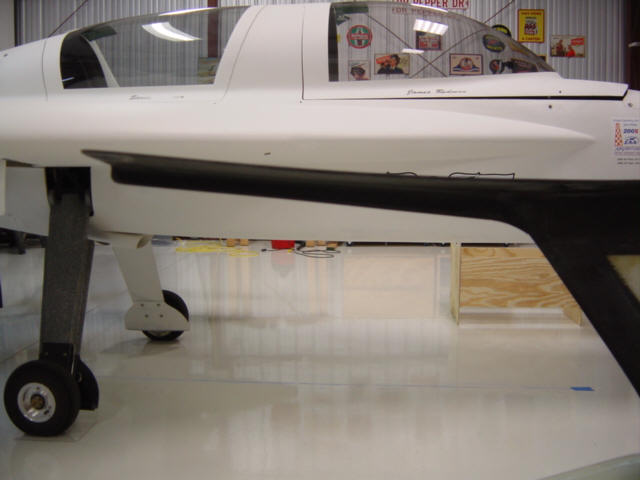
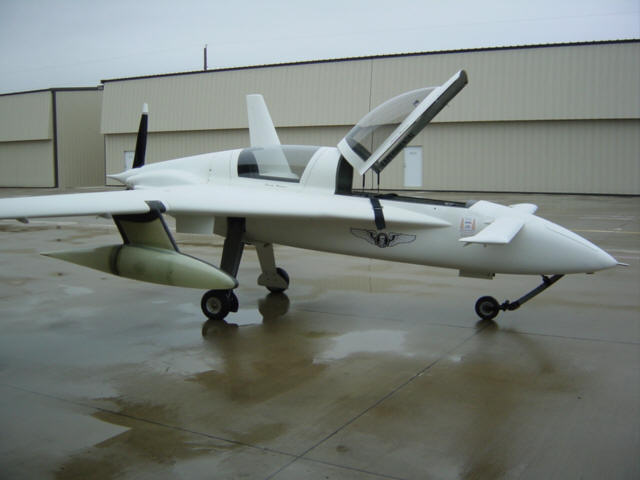
Now, I'm the proud owner of the first pair Berkut Luggage Pods!! Everyone that sees them comments on them...most seem to think it makes the plane look more aggressive - like it needed help with that? They do look ultra-kewl! See for yourself - head-on view, side view, close up view. I'll have some air-to-air shots coming soon.
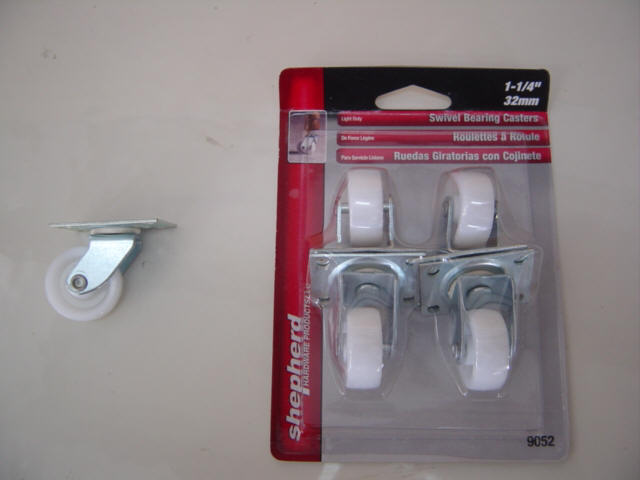
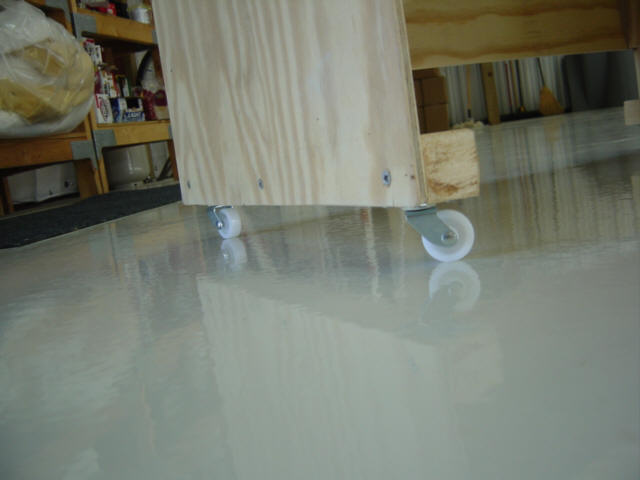
UPDATE: Rolling Cradles - After trying to hand carry the pods and cradles around the hangar for a few months, I decided to go ahead and add some rollers to the cradles to make things easier. So, on one of my trips to Agent Orange, I picked up some rollers and a 2"x2". These rollers come in both black and white - I choose the latter to keep from leaving scuff marks on the floor. The construction was very simple - just cut off a piece of 2x2 to fit across the bottom legs of the cradle, and shoot some screws through it to hold it in place. Then simply attached the rollers to the four corners and you got yourself a roll around pod carrier! Boy, are those nice! Doesn't matter if it's 2" or 50'...I can just scoot them out of the way very easily now. Well worth
the $10 of extra materials.
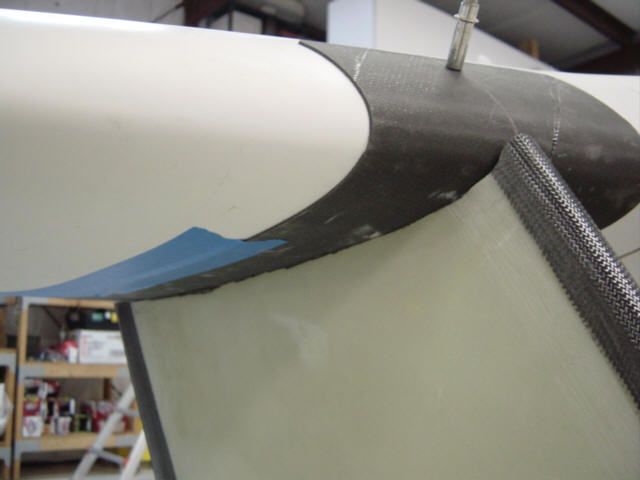
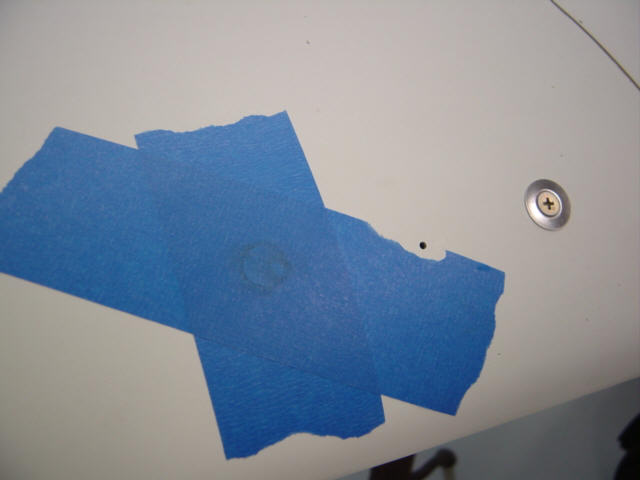
UPDATE: Mid-Span Hard Points - While making race mods, I needed to tweek the incidence of the right wing to reduce the drag from excess aileron trim. That part was easy...just change the washer size on the wing attach bolt to lower the angle slightly. OK...but with anything you do to an airplane, that was just the first domino to fall. Once the wing was changed, the interface to the strake had to be re-sculptured, which in turn changed the "fit" of the pod's upper strap to the wing. (sigh) So, I made up some micro with flox added (for durability) and enhanced the pod cuff to fit the new area. I used packing tape on the wing for mold release. Once it was cleaned up, I tried the fit and it was better than before. I installed the other pod and noticed that the fit was not quite as tight. This slop was from a combination of excess space between the strap and the wing skin...from the use of the thicker metal tape as mold release. I wiggled the pod and noticed there
was a little twisting of the strap going on inbetween the hard points. I figured I'd get rid of both of these issues while I had the plane down from some mods. I taped and filled the other pod strap the same way, and that helped. But, the lack of a mid-span hard point still allowed the strap to twist when the pod was loaded side to side. So, I measured the mid point betweent he leading edge and the main hard points. Drilled a pilot hole, and installed two more hard points in the wings. These added hard points eliminate any torsional movement in the strap and better secure the pod to the wing. Kinda got a "two-fer" on this one.
UPDATE: The Pods Take Flight! - I know it's late, but here are some pics from the first test flight with the pods attached. Gear coming up, Low approach, Side view, Just past center, Down the runway, and Touch down.
I'm flying the pods to Sun N Fun this year (2008), so I'll use that for the first real "pods loaded" cross-country test and let you know how it goes. Check back soon.
 Back to the Proto-page