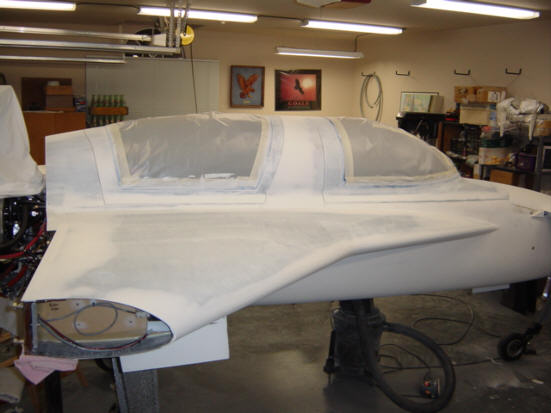
Well...it's finally time to make this project look like an airplane - it's time to finish and primer the exterior. As you have seen in the "Roll-over and Bottom finishing" section, this is more of the same thing...but this time I have to deal with canopy glass instead of the landing gear. In all, I think this time it's going to be easier since there is less to worry about.
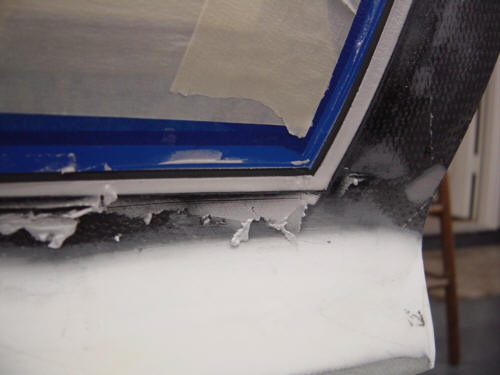
I started out by adding some micro to a few places that needed to be mated up a little better. First, there was the final fit for the canopies - I had to add about 3/32" of micro to the right roll-over structure and the same amount to the left rear canopy frame. This was due to a little flexing of the canopy frame when the plexi was bonded in - this is normal, by the way. I also had to add some micro to the front canopy lip to make a better transition to the canard fairing. I sanded all those out, and moved on to the hard part.
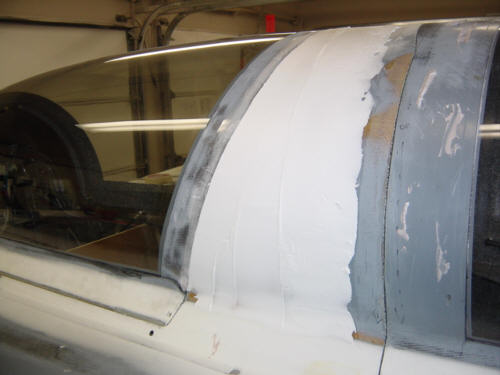
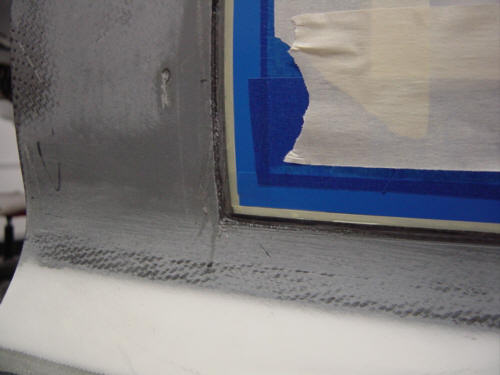
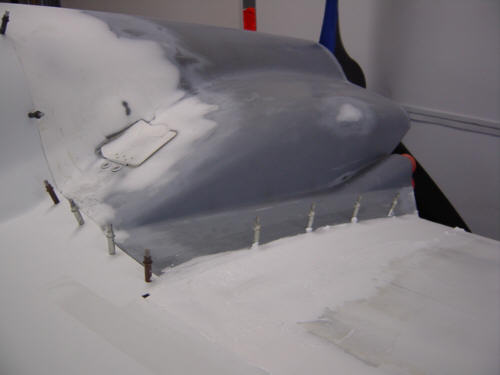
Finishing the exterior of the canopies was more difficult than the interior since the interior primer and Zolatone paint was able to much of the blending, here I have to do it with micro. So, I tapes up and covered the front and rear canopy glass just like I did on the interior. As you can see here, the intersection between the glass and the frame is much rougher. But, once I sanded it down and added the micro, it looked much better. One thing I did differently was to add a 1/8" Fine-Line tape to keep the border between the tape and the micro clean. It worked! After I put the micro down, I just pulled the narrow tape off and it left this nice clean line. After sand-down, this is where the primer and paint will go, completing the transition.
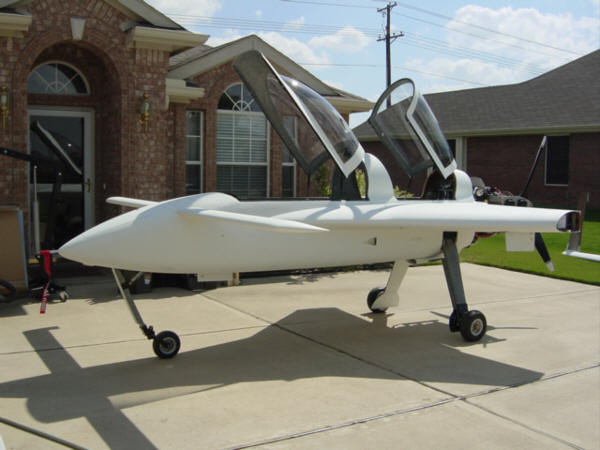
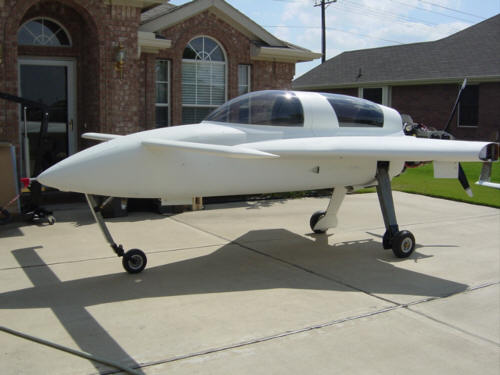
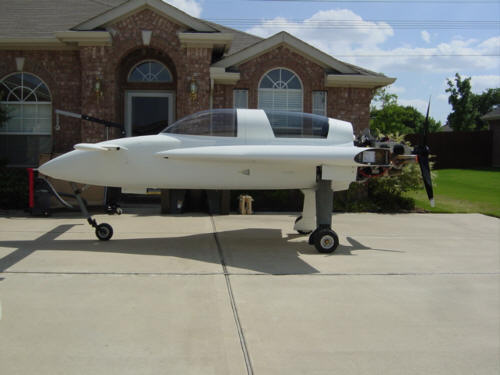
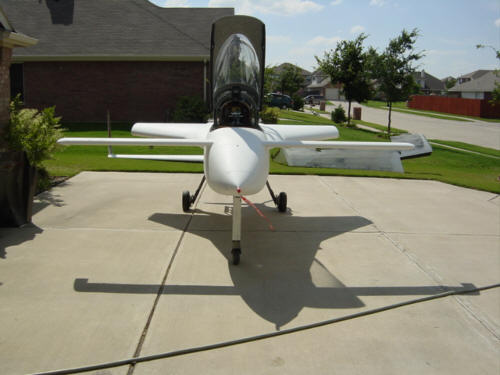
The next part is pure labor...hours of SANDING! All the upper surface was sanded with 80-grit to remove all gloss, oils, and any epoxy dribbles from years past. OK, with that done...it was time...time to put the primer down! After the first coat of primer, she looks like this. A few more coats...and she looks like...well...I had to roll her out to show her off!!!
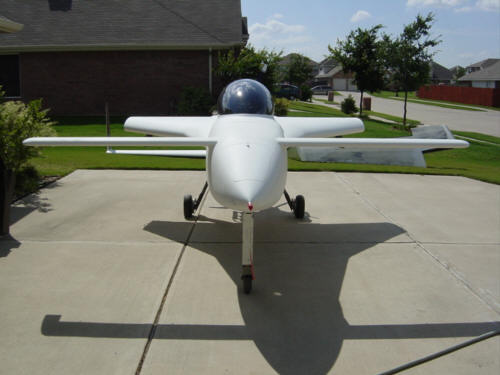
Here are some more shots from various angles to give you a better perspective - front view, left quarter, left side, head-on with canopies up. Remember, it's not all sanded down like the bottom is...but that will be completed very soon.
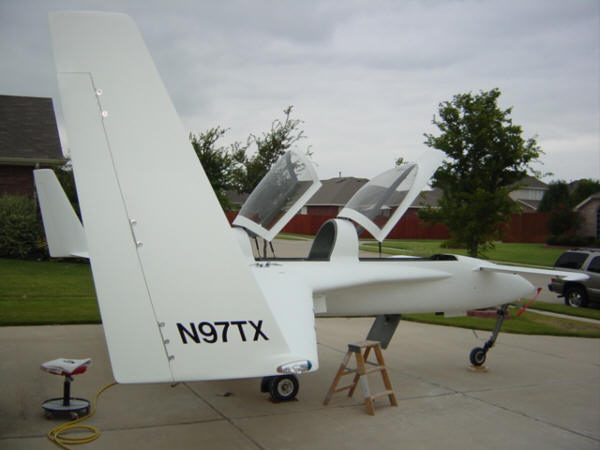
UPDATE 7-25-04: Well, you can see the date...we're in Texas...but it's 72 DEGREES outside with a lite breeze at 2pm!!!! Amazing! So, I opened the garage door and rolled the plane out to put both the wings on in the air-conditioned outside world. (I'm still amazed...) Long story short, I was mainly working on the aileron linkages and trim systems, but since I already had the wings on with Scott's help (my hangar mate and fellow Berkut builder) - I had him install the registration numbers on the winglets. Something interesting happened shortly there after - it really dawned on me how CLOSE I actually am to having a flying Berkut. She doesn't look like a "project" at all anymore...she looks like an....aircraft!!!! I fought back the tears and continued to work on the aileron rigging.
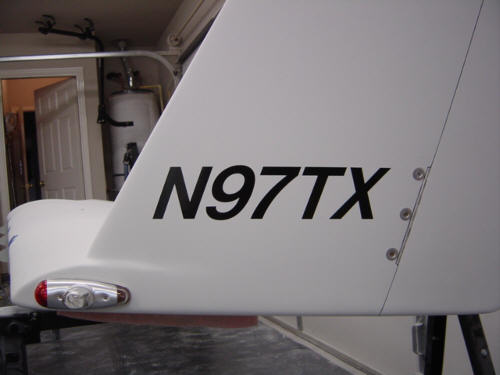
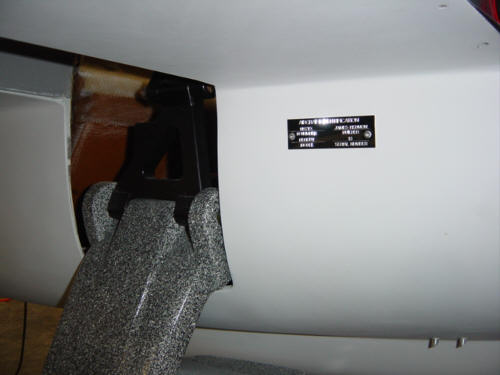
UPDATE 8-8-04: Once again, I changed my mind. I originally purchased and planned on using the standard 4"x4" data plate seen on most experimental aircraft. You know the one...shows the builder's address, empty/gross weights, etc. Well, that's all nice and good, but the FARs only require N-number, builder name, model, and serial number. I didn't like the look of the large one on the Berkut's sleek lines, so I went minimal instead. Here is a close-up for those interested. You can get this little puppy from Aircraft Spruce and Specialty - $9 engraved. A rare deal, for sure.
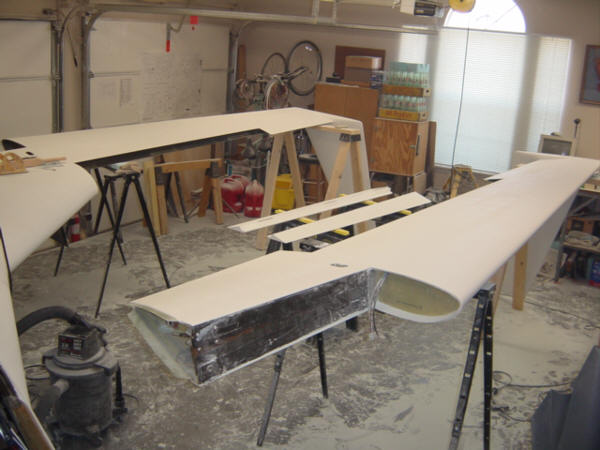
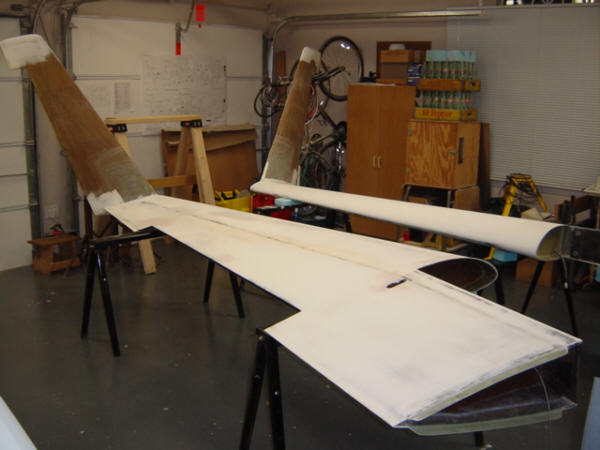
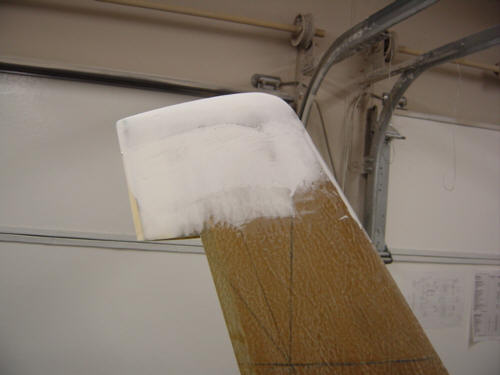
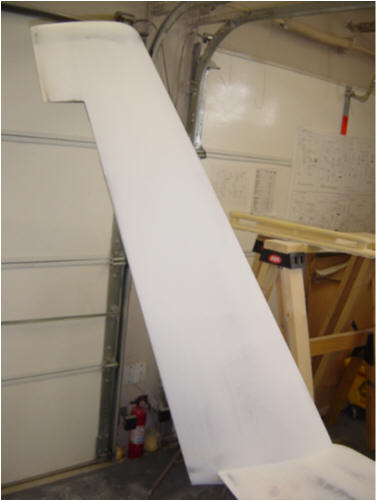
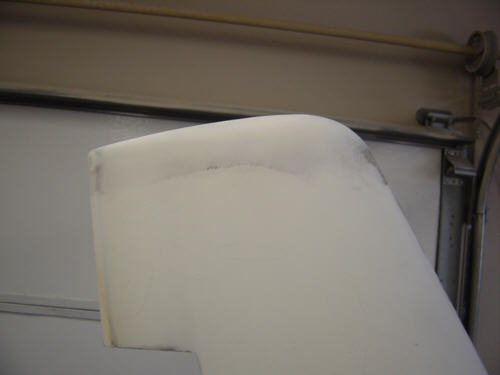
This photo of the wings was a product of a very long weekend of filling and sanding and filling and sanding and sanding and sanding! Whew! The top sides are done and almost ready for primer. During the many mixed of West micro, I also attached the winglet tips. They are simply blue foam carved to shape, slurried, and covered with two plys BID. They will look like this from the front. They too get covered with micro and sanded - these are just roughed-out shapes at that point.
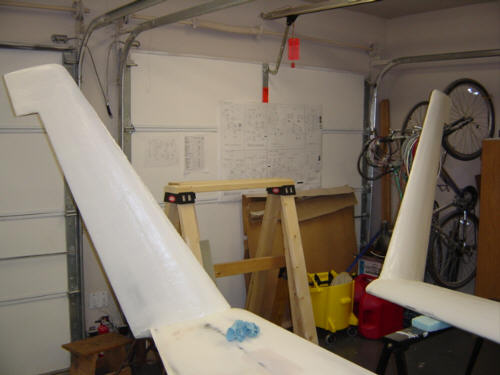
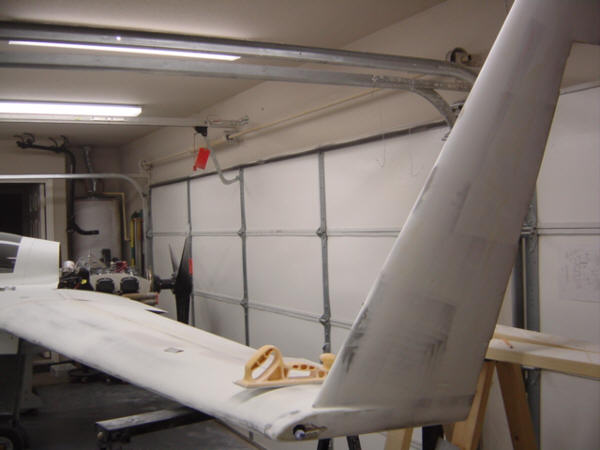
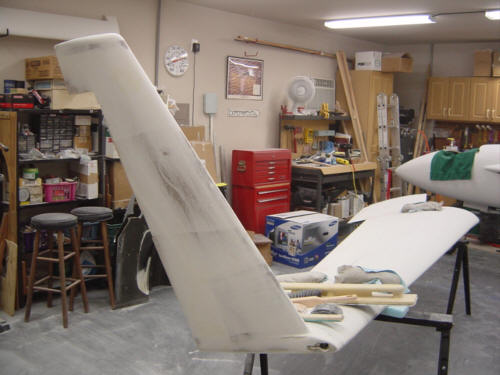
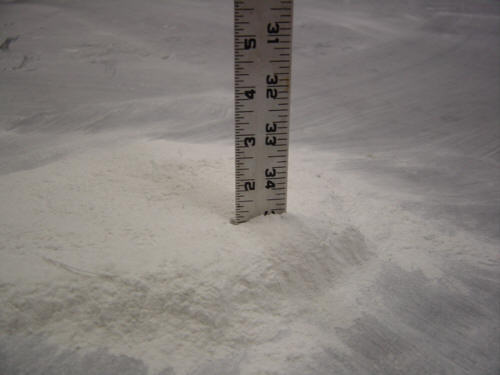
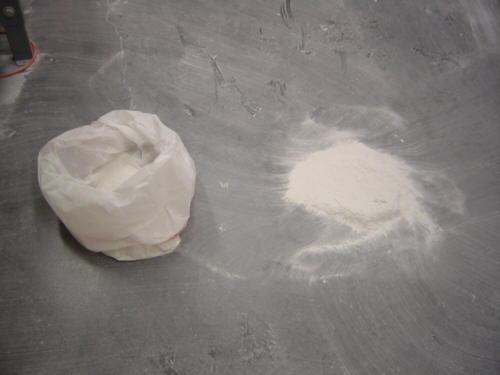
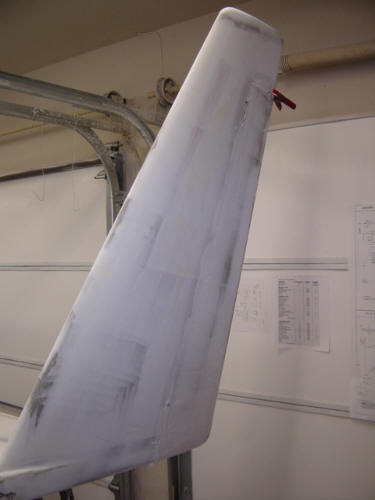
Next up - the winglets. I used the long memorial day weekend to finish up the contour sanding chores. I first coated the winglets with micro and let them cure. The next day, I sanded down a winglet through 80-grit on both sides. I really like the way the winglet tips turned out - a very pleasing shape...to me any way. Once I finished this wing, I put it back on the fuselage to do the cowl/wing interface fairing - I didn't to that last summer for some unknown reason! In that last pic, you can also clearly see the retrofit radio antenna and the various plys of material under the very thin micro. You can see the high spots on the other winglet as well...along with a layer of dust on EVERYTHING in the shop. Speaking of dust...I really sanded off alot of material. This pile was from only one side of a winglet...the other side was about the same amount as seen here in a garbage bag. This is more than a pound of filler from one winglet!
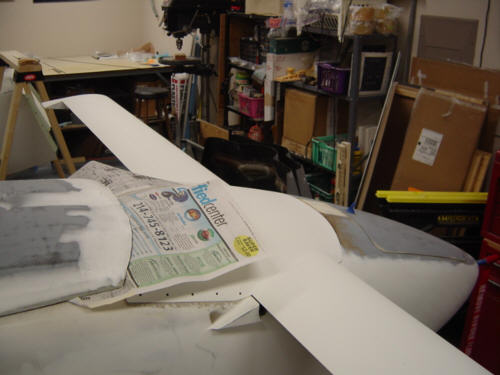
Whew...vertical sanding is a major pain...and I mean physical pain. I'm working on matching the rudders to the winglet now...and yes, you guessed it...I have to add some micro back onto the winglet side. (sigh) The bright side to this - after the winglets/rudders are done, I only have the lower wing skin to go! At last, the end of micro contouring is in sight! In fact...it's done....on the top side anyway. Now the entire top-side is of the plane is primered and ready for final sanding. (sigh...will it ever end?!?)
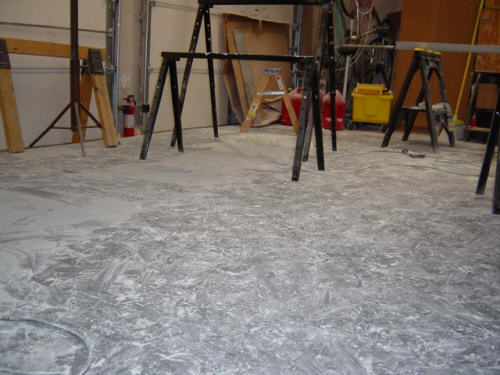
Something you might have noticed in the last several pictures of the finishing process - THE DUST!! This process make endless amounts of this talcum power like dust that gets everywhere, and covers everything. I've already cleaned up the shop twice and I'm NOT doing it again until I'm done sanding...at least that's the plan...time will tell.
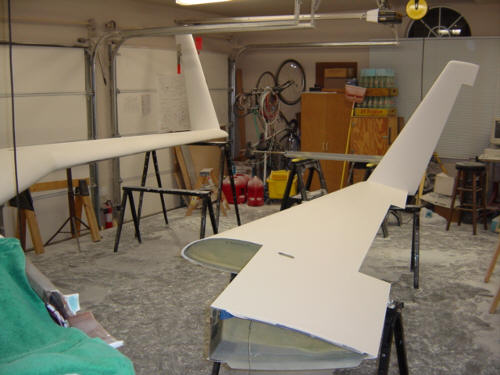
UPDATE 7-22-04: ...and at long last, I have finally completed the WINGS!!! They are now ready to install on the fuselage. Before they fly, I'll be installing vortilons on the leading edges, but other than that....est fini!!
 Back to the Proto-page