
I have to say, this was one of the more tedious projects, and it ate up quite a bit of time. It involved a lot of trials to get just the right thickness and density of foam all in the right places. You see, I'm only 5' 8", and the Berkut can accommodate folks as tall as 6' 11"...and my plane is no exception. The difference is made up with the thickness of foam padding in the seats. The trick, you ask? Well...the foam does not have a consistent density through a spectrum of temperatures. That means, as the foam warms up, it gets softer and you sink into it. The temperature in the workshop at the time was about 65-degrees....the foam is all rather stiff. I had to keep putting down foam, getting in, letting my body heat warm the foam, sink into position, not the position and then keep experimenting to find the right height the forward position. But, at least it was comfy work and I finally did get it right - I can see all the instruments without any head-bobbing, I can reach the pedals, and see over the nose. By the way, there is a reason for the two-part seat cushions - so you can remove the back portion when flying with a parachute strapped to your back...a requirement for 2-person aerobatics, and just good common sense for 1-person too.
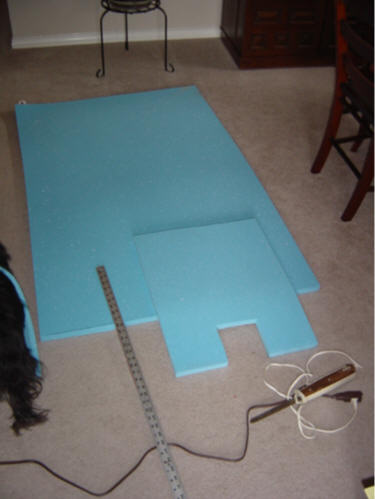
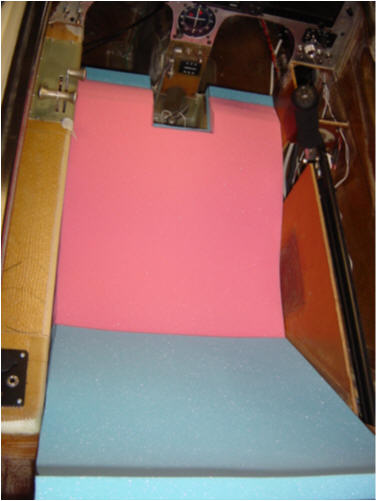
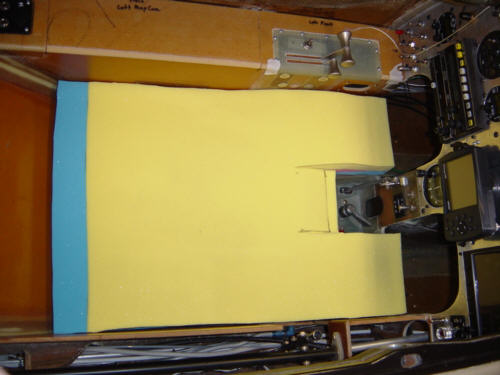
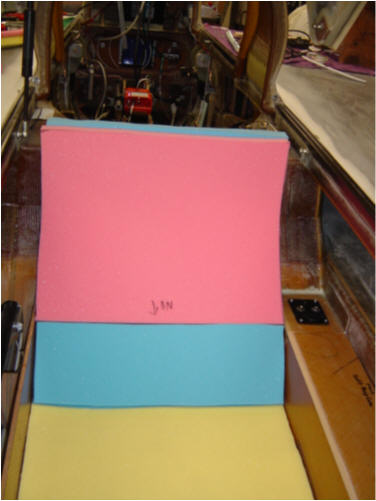
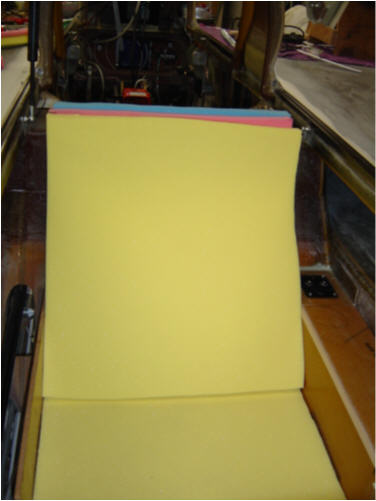
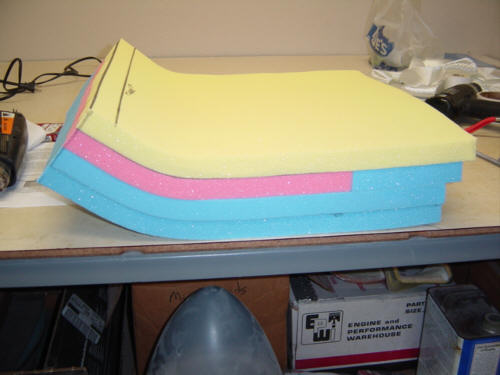
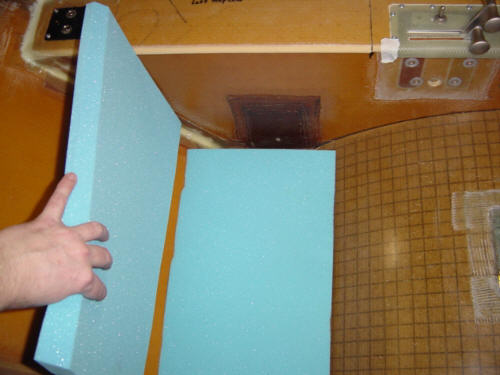
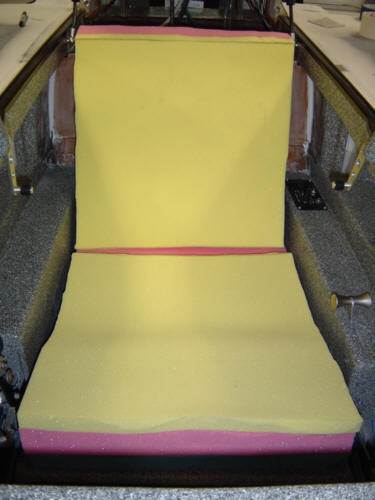
I am using a non-flammable product called Con-for Foam - a standard in many composite and metal aircraft today. The mechanics of this process are very basic...measure, cut and glue together pieces of foam to make the desired thickness of pad desired. There are three densities of foam: Blue = Firm, Pink = Medium, Yellow = Soft. So, here we go. I took the measurements of the front seat area and cut out the bottom layer from the firmer blue foam stock. The square cut-out in the front is for the fuel valve and landing light access area seen here. The next layer uses medium density pink foam and is glued to the previous layer using 3M Super 77 Adhesive. You will also notice that the forward "legs" of the pink foam are tapered down. This is to reduce the overall thickness of the pad in this area - as not to restrict "foot space" for getting in and out of the aircraft. The final layer is from the soft yellow foam. This is the layer that "conforms" to every wrinkle and crevasse of your body. As a whole, the front lower seat cushion looks like this. You will note the taper of the forward pink foam, and the addition of some blue foam at the back for stiffness - this is where the upper and lower cushion will meet. By the way, I used an electric carving knife and it cut through the foam like butter and made nice smooth cut-lines! The only way to go in my opinion.
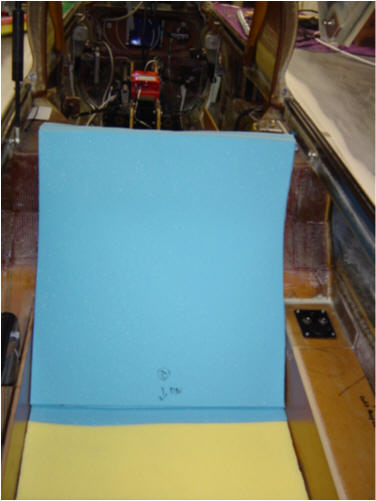
The upper cushion was constructed the exact same way. I started with two blue layers as a base. Then added a pink and blue layer next. The firmer blue strip was installed for a little extra lumbar support...and it works. And of course, it was finished off with the soft yellow layer. Once bonded together, the composite cushion holds it's shape.
Now a little honesty...the standard 3" thick cushions were not enough for me. I ended up making the upper pad 4" thick with 2-plys of blue foam, and added a full 3" of blue foam under the lower cushion. The foam under the lower cushion will be removable for larger pilots if ever needed. Plus, I am thinking about making a small box structure to take the place of this extra foam. It could be used to hold first-aid and/or survival gear, or just be some added map-case space.
UPDATE 5-16-04: I finally finished the back seat foam. It's the same process, so I will not bore you with the details...but here is how it turned out - back-seat foam.
UPDATE 7-26-04: OK...I did it - I bit the bullet and sent the seat foam off to the professionals to upholster. (sigh) I really can't afford this right now...but I really didn't want to cut up my work towels for cushion covers. ;-) Check back soon - they whould be ready in less than two weeks.
UPDATE 8-8-04: Well...as you can see from the top photo - they are finished, featured is the front seat. I have to say, and I don't say this often about many people, this guy exceeded my expectations by a long shot!! The upholstery was done, at a VERY reasonable price, by Frank at Frank's Upholstery in McKinney, Texas (972)-562-2316. He even made the arm rests, and the black leather stick boot. Here is what the back seat looks like too. The camera flash just doesn't capture the colors correctly...but trust me, it looks fab-o! A+++ in my book!
 Back to the Proto-page