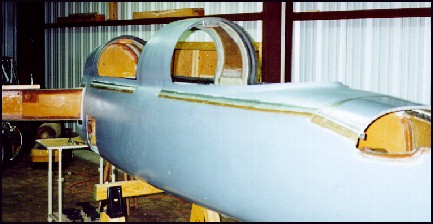
After the longerons are installed, it is time to install the canopy frames and crnstruct drip rails. The carbon fiber, molded canopy frames are positioned and trimed to fit. Aluminum hard ponts are installed in the frames so that the canopy latches can be installed at a later date. Ply-wood is used to make flat molds that are placed against the rear turtle-deck arch and the two sides of the roll-over structure. 4-plys of BID glass are layed-up onto the tape covered molds to form the inside wall of the drip rails. Later, these walls will be trimed back and a cusp will be added so that any water that makes it past the seal will be channeled down the sides and exit through a small hole in the fuselage.
The drip rails and seals attached to the canopy frames and the inside of the fuselage are molded by the builder. First, the longerons are covered with duct tape as a mold release and then 3-plys of BID are layed-up over the longeron forming the seal lip. Then the canopy frames are seated down onto the wet BID cloth. Dry-micro is used to fill the gaps between the lip and the canopy. 2-plys of BID is then added to the interior and exterior of the lip seals (the hardpoints are captured in the micro). Once this all cures, the canopy frames are removed and the seals and rails are cleaned up and trimed. These structures are VERY stiff and just do not flex that much - but still very lite!
The canopy bubbles, latches and hinges will be added later, after more of the insterior and systems are completed.
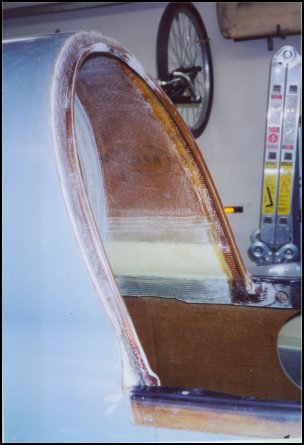
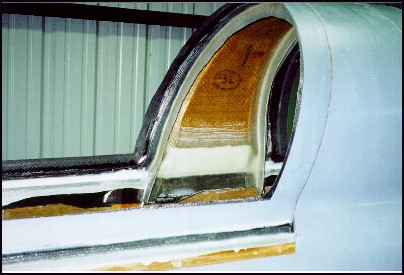
UPDATE: The canopy drip rails is a Berkut exclusive - as far as I know, it is the only Canard aircraft that has them as a standard kit process. The pictures above show the flat lip that was formed around each of the canopy for and aft sides. Now it is time to add the 'curl' that redirects any water down to a small bowl and then out the side of the airplane.
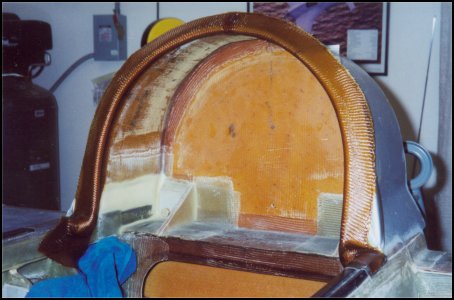
First, aluminum tubing is shaped and used as a mold for the drip rail. It is super-glued to the lip and held in plance until dry. If you look closely, you will see small foam balls at the bottom ends of the tubing. These will be covered with duct tape and used to shape the 'bowls' at the bottom of the rails. The next step is to cover the lip with duct tape used as mold release, sand the area, and prep for a 3-ply BID lay-up.
And here it is... The layup is wrapped around the tube from the back side of the lip, onto the duct tape on the front. Later, when it is all cured, the excess material is cut back and sanded to final shape (see picture above). Presto....driprails.
There is a little more work to be done on the rails to allow trapped water to exit, but that will not be done until after the top strakes are installed.
 Back to the Proto-page